

Applies to AnyLogic Cloud 2.5.2. Last modified on April 11, 2025.
The User profile screen contains general information about your user account.
To open the User profile screen
-
Go to
 the user menu >
  Profile.
You will see your public profile page.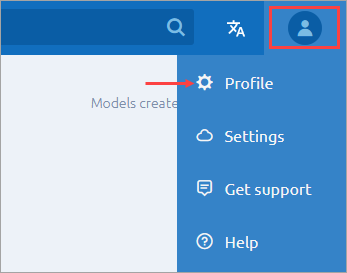
-
Click Edit profile.
The edit screen for the profile will open: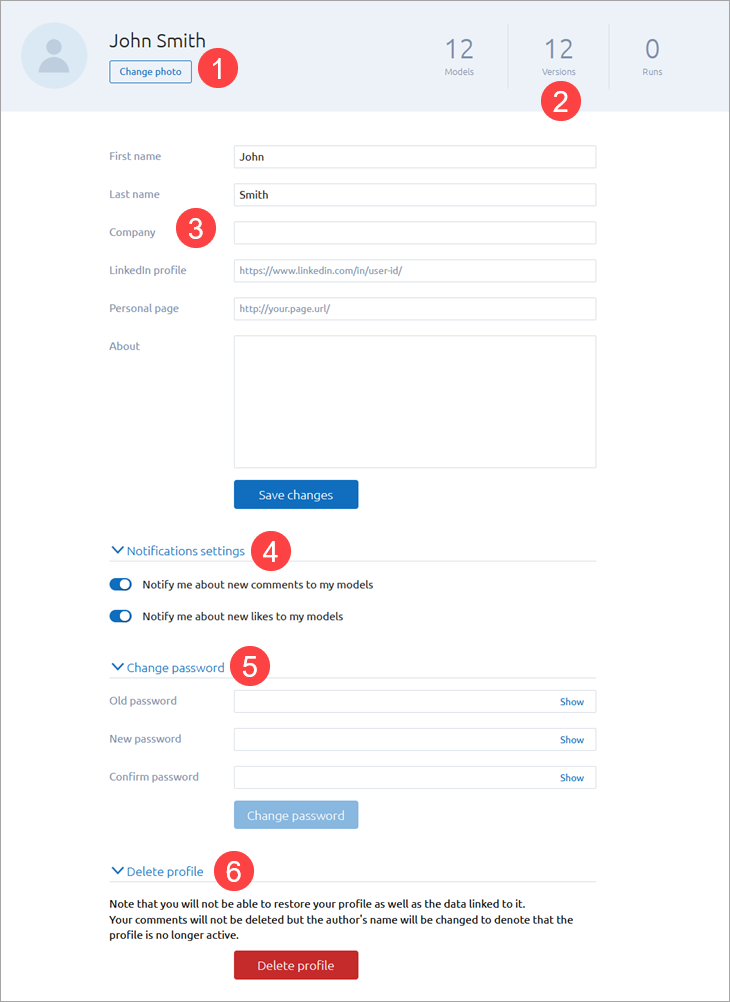
On this screen, you can configure your user account using the provided controls.
The screen contains the following sections:
-
Profile photo — Displays your profile photo.
- To set a new photo or change the existing one, click the Change photo button and browse for the image file that you want to set your profile photo.
- To delete the profile photo, click the Delete button (active only if you already have a profile photo).
-
Statistics — Displays the following data on the models contained in the My Models folder:
- The number of uploaded Models.
- The number of model Versions.
- The number of performed experiment Runs.
-
Personal information — Allows to specify or modify the following personal data:
- First name — Your first name.
- Last name — Your last name.
- Company — The company that you represent.
- LinkedIn profile — The link to your profile at LinkedIn.
- Personal page — The link to your page at any other domain name.
- About — Say a few words about yourself.
In Private Cloud, if your Cloud account was created automatically upon authentication via LDAP/AD, you cannot modify your personal information, if it is retrieved from the LDAP/AD server database. Contact your system administrator. -
Notification settings — (collapsed by default) Allows to specify whether you want to receive the email notifications when certain events occur:
- Notify me about new comments to my models — If selected, you will receive an email notification when someone leaves a new comment to your model.
- Notify me about new likes to my models — If selected, you will receive an email notification when someone clicks the Like button under your model.
-
Change password — (collapsed by default) Allows changing your AnyLogic Cloud password.
In Private Cloud, if your Cloud account was created automatically upon authentication via LDAP/AD, you cannot change your password. Contact your system administrator.
-
Delete profile — (collapsed by default) Expand to remove your account from AnyLogic Cloud.
You will not be able to restore the account and the data it contains:
- Profile data (name, links, descriptions, other details).
- Uploaded models. The shared access to such models will be lost. A model will not be deleted if you assign the Developer role to another user. In this case, this user will receive full ownership of the model once you delete your account.
- Your comments will not be deleted. The author’s name will be changed to indicate that the account is inactive.
The API section of the user profile screen is available to Cloud subscribers and Private Cloud users:
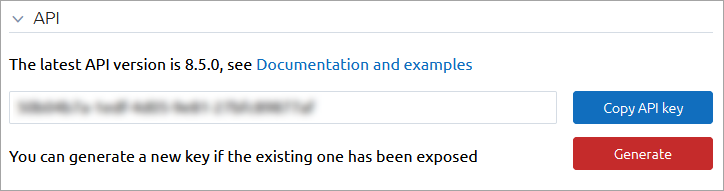
This section contains an API key that you can use to interact with your AnyLogic Cloud environment with your standalone tests and applications. To learn more about AnyLogic Cloud API, see the documentation.
- Click Copy API key to copy the API key to the clipboard.
-
Click Generate to generate a new API key.
Upon generating the new API key, the existing one will be disabled. Make sure to replace the API key in all your tests and applications.
To change your AnyLogic Cloud password
- Expand the Change password section.
-
Type your current AnyLogic Cloud password and your new password in the Old password and New password fields, respectively.
To switch the password’s visibility during input on or off, click Show or Hide on the edit box’s right.
- Confirm your new password by typing it again in the Confirm password field.
- Click the Change password button to apply changes.
You can view the information about other AnyLogic Cloud users from their public profiles.
To open a public profile of a user
-
For models you are developing: Open the Sharing tab of the model screen and click the name of the needed user in the Model access section.
For models developed by other users: Open the model screen and click the name of the needed user in the Developers: field.
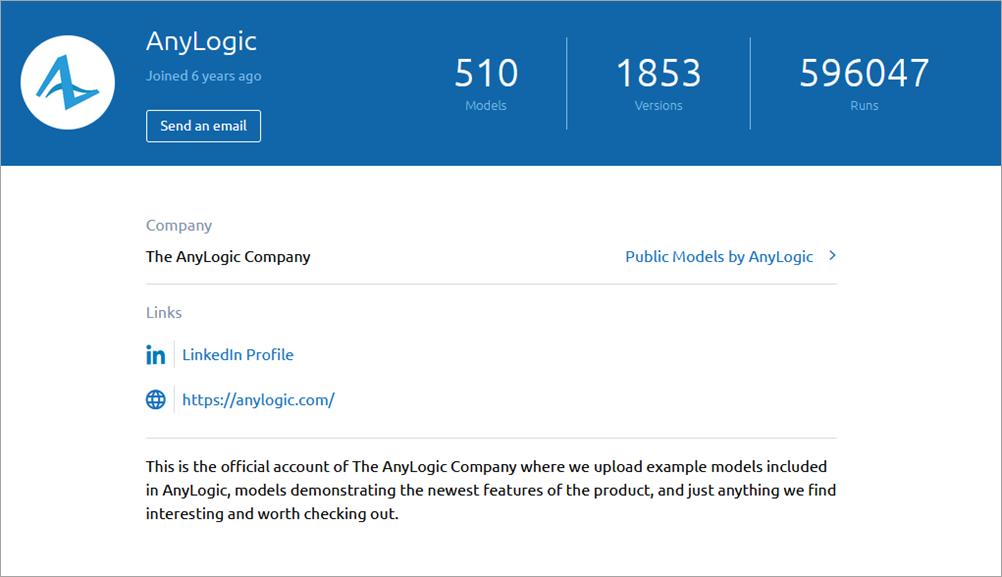
Each public profile contains the information the user provided in their personal information, as well as the following statistics:
- The number of models the user develops,
- The number of versions of these models,
- The number of model runs.
To open the user’s model list
- Click Public Models by user in the public profile of this user.
To send an email to a user
-
Click the Send an email button in the public profile of the needed user.
You must be logged in into AnyLogic Cloud to proceed.
- In the subsequent form, type your message. Use plain text.
- Click Send.
Your message will be emailed to the user. In the From field of the resulting letter, the AnyLogic support email will be specified, so your personal information will not be revealed.
For this functionality to work in Private Cloud, make sure to configure the SMTP server in configuration files first.
The resulting letter will contain a link to your profile which the message recipient can use to access your public profile directly.
To delete your AnyLogic Cloud account
- Expand the Delete profile section.
- Read the warning message. If you wish to proceed, click the Delete profile button.
- A confirmation box will pop-up, informing you of irreversible changes that will affect your account data.
- Click the red Delete button to delete your account completely.
-
How can we improve this article?
-