You set all attributes of the library in the library editor.
To open the library editor
-
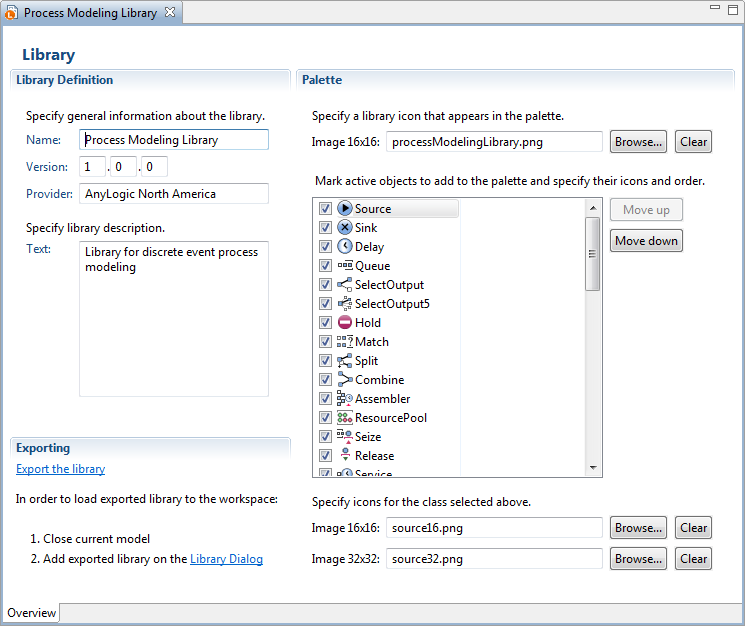
Double-click the library in the Projects view. You will see the library editor opened:
 The library editor
The library editor consists of three sections:
- Library Definition — this section enables you defining some general properties of the library.
- Palette — this section contains controls for customizing the library appearance in the Palette view.
- Exporting — this section provides tools for exporting your library.
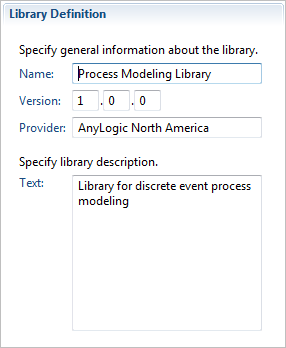
Here you define the general attributes of the library:
- Name — the name of the library.
- Version — the version number.
- Provider — the name of the owner or the developer of the library.
- Text — the description of the library that can be helpful for other library users.

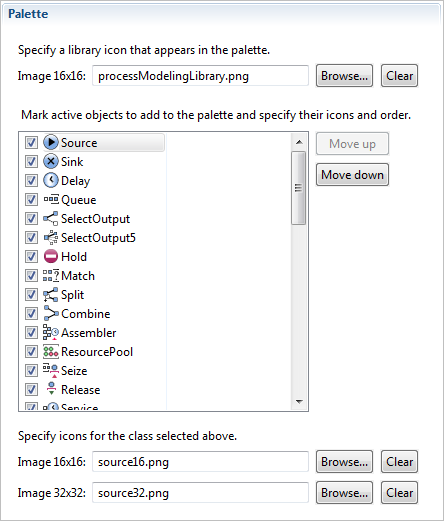
Libraries loaded into AnyLogic workspace are displayed in the Palette view. Each library has its own stencil, where library blocks are shown as icons. You can customize the appearance of the library in the Palette. Namely, you can specify the library icon that appears for the library stencil of the Palette, control the set of agents visible in the palette, specify specific icons for these classes and the order they appear in the palette stencil.

To specify library icon to be shown in the library palette
- In the Palette section of the library editor, click the Browse... button under the Palette section title and choose the image file you want to make the library image.
- If you want to remove the association, click the Clear button in the same section.
To configure the set of agents visible in the palette
- Select the corresponding check boxes for the classes you want to be present in the palette.
- If you want to change the order of classes in the list, select the class and move it using Move up and Move down buttons to the right of the list. The order of the classes in the list defines the order they will appear in the palette stencil.
- You can customize icons of the classes. For that, first select the class by clicking on its name and then specify large and/or small icon for the selected class using the controls below the list.
When finished configuring the library attributes, export it. Exported library is a Java archive (JAR) file that can be delivered to other users.

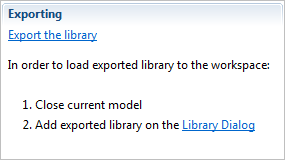
This section takes you through the library export process acting as original export wizard. It contains the active link prompting library exporting ( ) and also describes how the exported library should be added to the workspace.
Clicking on the Export the library link you open the Export Library dialog box prompting you to specify the location of the target JAR file. Clicking Finish in the dialog, you get a JAR file containing compiled and packed library classes.
Now you can add this library to AnyLogic workspace as it is described Managing libraries.
Please note that if you want to open the library in the same AnyLogic instance where the original model containing the classes of this library is opened, you should first close this model.
-
How can we improve this article?
-

