

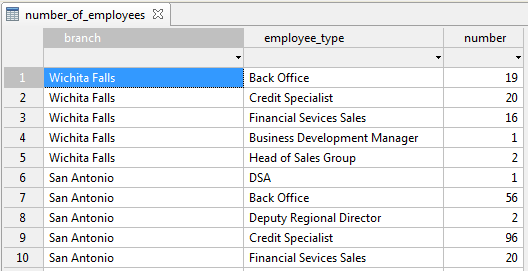
Database table editor displays data contained in database tables and views. Editor displays tables in a common way, as a number of fields (columns), and rows. Data can be sorted and filtered.
You also use the table editor to see the model execution logs, but they are shown in read-only mode, you can only view data, but not edit data.
To open the database table editor
- In the Projects tree, expand the model’s
 Database item.
 -
In the Database branch, double-click the table item. You will see the database table editor opened in the center of the workspace.
When you create empty database tables, you may need to enter the data in the table manually.
To enter a new value
- Click the table cell, and type the new value there.
To modify a single cell or multiple cells
- Select the cells you want to modify. Single mouse click selects one cell. To select multiple records, use Shift + click and Ctrl + click (Cmd + click on macOS), or select the cells with the mouse (drag with the left mouse button being pressed).
- Right-click the selection, and select the required action (Cut, Copy, Paste, Clear contents) from the context menu.
To modify the complete row (record)
- In the leftmost column displaying the record numbers, select the rows you want to modify. Single mouse click selects one record. To select multiple records, use Shift + click and Ctrl + click (Cmd + click on macOS).
- Right-click the selection, and select the required action (Cut, Copy, Paste, Clear contents, Delete rows) from the context menu.
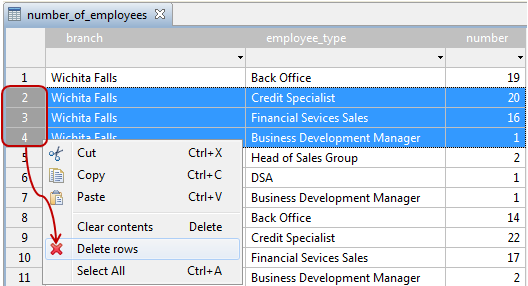
Below we will give the detailed instructions for one specific command: deleting a set of table records.
To delete a single table record or multiple records
- In the leftmost column displaying the record numbers, select the rows you want to delete. Single mouse click selects one record. To select multiple records, use Shift + click and Ctrl + click (Cmd + click on macOS).
-
Right-click the selection, and select Delete rows from the popup menu.
 — The column can contain only unique values.
 — The column is indexed.
 — The column acts as a foreign key. Foreign key is a field in one table that uniquely identifies a row of another table by referring to the primary key defined there. For example, you have a table named FLIGHT that has a primary key named FLIGHT_ID. Another table called FLIGHT_DETAILS has a foreign key which references FLIGHT_ID to uniquely identify the relationship between both the tables.
 — The records in the table editor are currently sorted by values in this column, in ascending order.
 — The records are sorted by values in this column, in descending order.
You may sort the records in the table editor. Sorting does not reorder the records in the table that you are using, it just displays them in the editor in the specified order.
Text fields (String) are sorted alphabetically, numerical fields are sorted by number.
You can sort the records only by one column, either in ascending, or descending order.
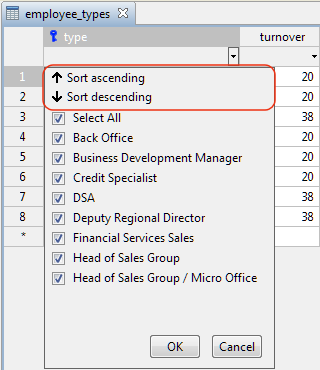
To sort the records in the table editor (ascending or descending order)
-
Click the grey cell in the type column below the column name, and above the first row with the data. The drop-down menu will appear.
-
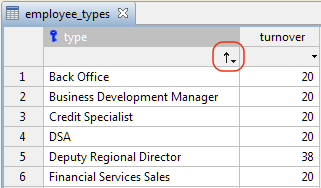
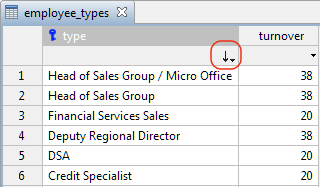
Choose Sort ascending to sort the values in the column in ascending order. You will see the icon, indicating that the records in the table editor are currently sorted by values in the ascending order.
-
Now choose Sort descending to sort the values in the column in descending order. You will see the icon, indicating that the records in the table editor are currently sorted by values in the descending order.
-
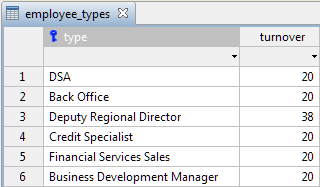
To return to the non-sorted order of the values, you must click the grey cell and deselect the order type that you are currently using in the drop-down menu. The ascending/descending order icon will disappear from the table column cell.
You may want to see only some specific records of the database table.
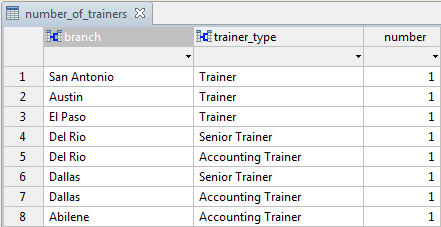
For example, you want to see only the records on the trainers available at Dallas. You can easily filter the table records and show only the records that contain the specified values.
To filter table records by some value
In our case we will filter the values by displaying only the records having Dallas value stored in the branch column.
-
Click the grey cell in the branch column, below the column name, and above the first row with the data. You will see the popup list opened. Here you can select the records that you want to see by selecting the values that are allowed.
-
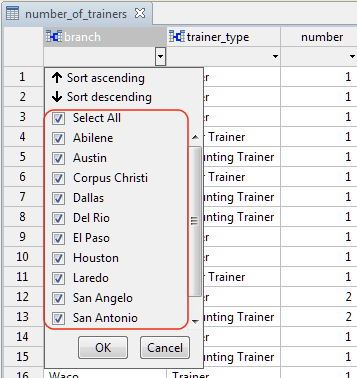
We want to show only the records that have Dallas value in the branch column. We have to deselect all other values in the list and leave the Dallas only selected. It is easier to deselect all the options by clicking the Select All option in the list. This will deselect all the options. Now select Dallas by clicking on it and enjoy the result:
You can see the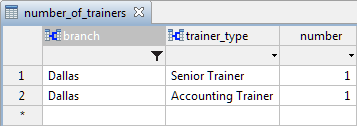
 icon shown for the branch column. It indicates that the records are filtered by some values in this column.
You can continue filtering the records by specific values in other table columns if needed.
-
How can we improve this article?
-