

Applies to AnyLogic Cloud 2.5.2. Last modified on April 11, 2025.
When exporting to Cloud, you upload a model itself with the explicitly stated inputs, outputs, and properties configured in the Run Configuration editor.
Keep in mind that none of the experiments prepared in the AnyLogic desktop installation will be available to you out-of-box in Cloud — the Run Configuration editor only lays the groundwork for your further experience with the model.
After the export finishes, you will need to configure the experiments using the designated inputs and outputs in the Cloud web UI.
To export a model to AnyLogic Cloud
-
To export the model, do any of the following:
-
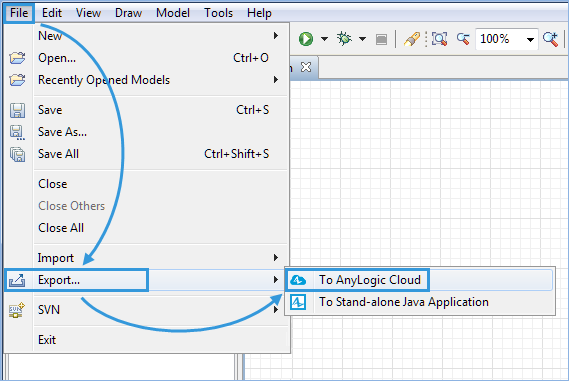
Select an item of the model in the Projects view and choose File >
 Export >
  To AnyLogic Cloud from the main menu.
-
Right-click the model in the Projects view and choose Export > To AnyLogic Cloud from the context menu.
If the menu item appears inactive, make sure you have configured the model export properties in the Run Configuration editor.
-
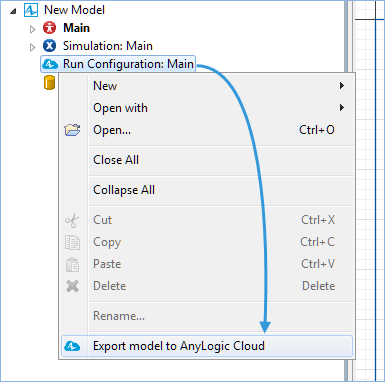
Right-click the Run configuration element in the model’s tree of elements and choose Export model to AnyLogic Cloud.
-
Click the Run configuration element in the model’s tree to select it. Navigate to the general section of its properties and click the Export model to AnyLogic Cloud link.

-
Select an item of the model in the Projects view and choose File >
- If your model contains unsaved changes, AnyLogic will prompt you to save them. Click Yes in the Save confirmation dialog box to save changes.
-
The Export Model to AnyLogic Cloud wizard will open up. If you are already registered in AnyLogic Cloud, enter your login information in the E-mail and Password fields and click Log in:
Otherwise, you will have to register in AnyLogic Cloud. Click the register new account link to open the registration page in your browser. Follow the instruction steps to register on the site. After registration is complete, return to the export wizard to enter your login information. Click Log in when finished.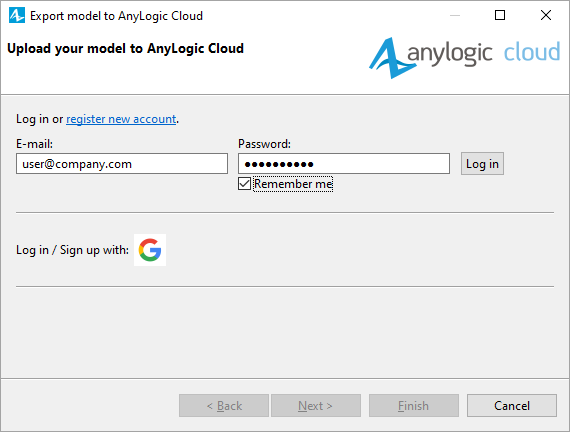
-
Choose whether you want to add a version to the existing model or to create a new model. If you already have a model exported to AnyLogic Cloud and want to update it to the latest version, choose the required model from the drop-down list.
If you want to create a new model, choose the Create new model option. -
From the Icon list, select the image you want to display on the model tile in AnyLogic Cloud.
Important: This option is only available the first time you export this particular model to AnyLogic Cloud.
Here AnyLogic offers to select the presentation of the model’s top-level agent or one of the model’s experiments (except the custom experiment) as an image. The icon only displays the visible part of the presentation (area of the graphical diagram inside the model frame). You can change the icon to any other image in the model screen. -
Remove the selection from the Include model source files check box if you do not plan to share the model’s source files with other users.
If you choose to export the source files, the next step will allow you to select the files to export.
-
Remove the selection from the Provide public access to this model check box if you do not want this model to be added to the Public models section. This way, you will export it as a private model. You can provide other users with access to this model later.
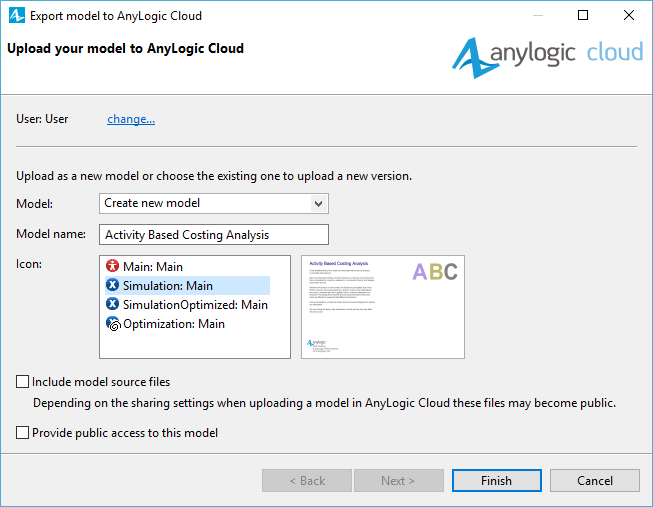
- Click Finish. The model will be exported to the My models section of AnyLogic Cloud.
To export a model to AnyLogic Private Cloud
-
Open the Connection page of AnyLogic preferences.
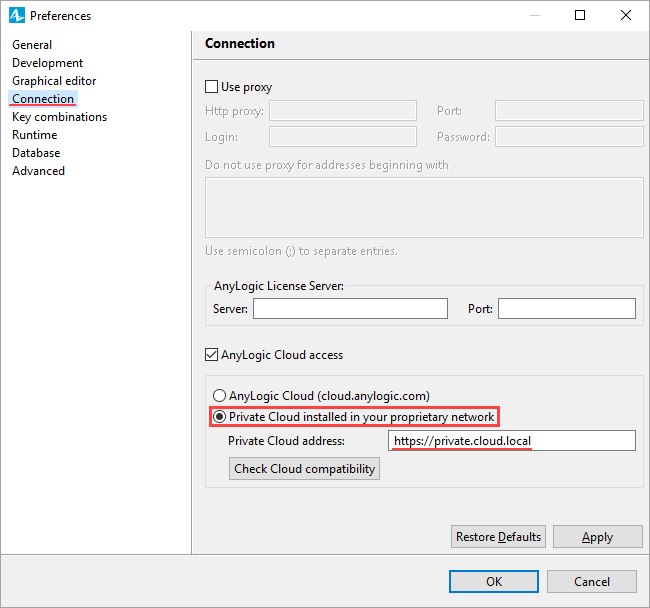
- Make sure the AnyLogic Cloud access check box is selected.
- Select the Private Cloud installed in your proprietary network option.
- Specify the address of your Private Cloud instance in the Private Cloud address: edit box.
- (Optional) Click the Check Cloud compatibility button to make sure the connection with your Private Cloud instance works properly and check, whether your AnyLogic Private Cloud is compatible with your AnyLogic application.
- Click Apply to apply the changes you have made and close the dialog.
After this, export your models as you usually do. All interactions with AnyLogic Cloud from your AnyLogic application will now take place within your Private Cloud instance.
To re-establish the connection with AnyLogic Cloud at cloud.anylogic.com, select the AnyLogic Cloud (cloud.anylogic.com) option on the Connection page of AnyLogic preferences.
-
How can we improve this article?
-