

Applies to AnyLogic Cloud 2.5.2. Last modified on April 11, 2025.
AnyLogic Cloud is a web portal that hosts simulation models and allows you to run your models online and share them with other users.
AnyLogic models hosted at AnyLogic Cloud run on a server and do not require AnyLogic to be installed on the end user’s computer. The execution process is visualized in a web browser.
This tutorial describes how to upload and run your model in AnyLogic Cloud. We will use the Activity Based Costing Analysis model as an example.
In this simplified factory floor model, the cost associated with product processing is calculated and broken down into several categories for analysis and optimization.
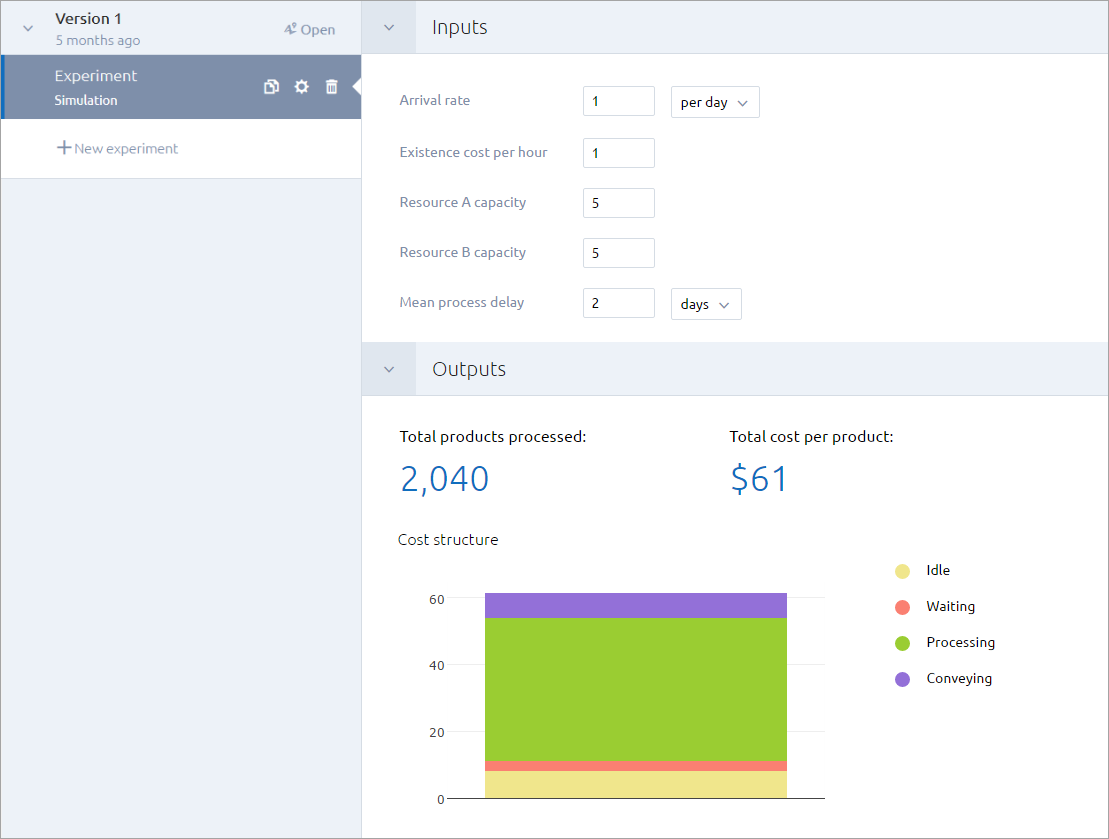
After completing the tutorial, you will be able to view your model in AnyLogic Cloud, create experiments, run them with the provided parameters’ values, and view the output results:
 AnyLogic Cloud experiment screen
You need to download the example model to repeat the steps described in this tutorial.
- Open the model page in AnyLogic Cloud by clicking the Demo model button.
-
You will see the model page in AnyLogic Cloud.
Click Model source files to start downloading the archive containing the model.This button is only visible if the user who uploaded the model chose to include the model source files during the upload.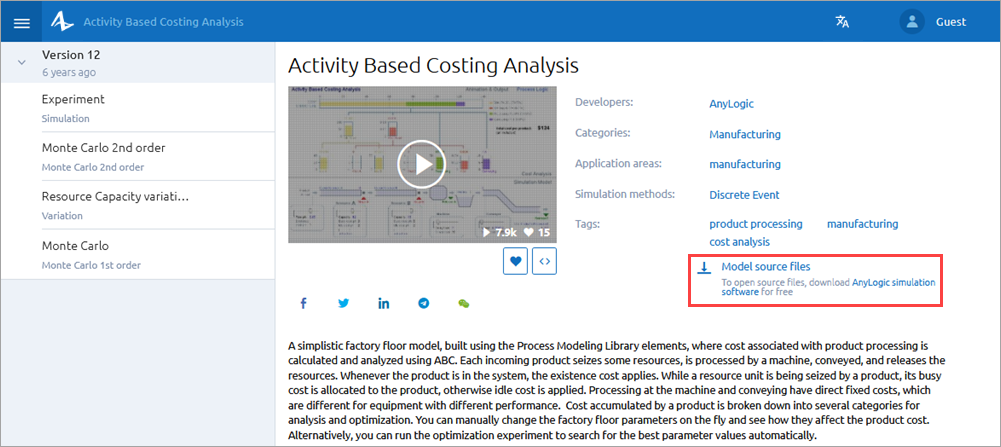
-
Your browser will handle the download.
When finished, unzip the archive to a convenient location. - Open your desktop installation of AnyLogic.
-
Click the Open
 button on the toolbar.
-
In the Open dialog box, browse to the ALP file of the model you want to open.
Double-click this file or click it and then click Open.
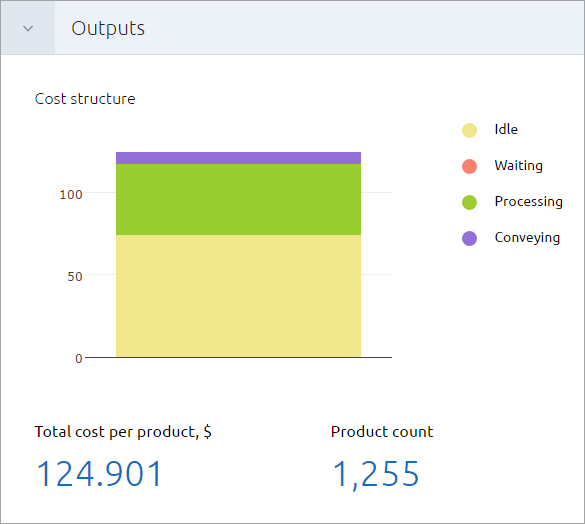
The Outputs section of AnyLogic Cloud experiment screen is populated by the elements of the  Analysis palette defined in the model. This section is used for displaying the data in the form of single values as well as charts.
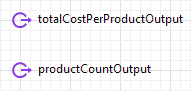
Our model has the two following metrics that we would like to see in the results of the experiment: Total cost per product and Total products processed. To display these values on the AnyLogic Cloud experiment screen, we need to create two  Output elements inside the model.
Create and configure two Output elements
-
Drag two Output elements from the Analysis palette onto the Main diagram.
-
Name them totalCostPerProductOutput and productCountOutput, respectively.
-
Configure these two elements:
-
Navigate to the properties of the totalCostPerProductOutput element:
- In the Value field of its properties, type totalCostPerProduct() — here we call the totalCostPerProduct function defined in the Main agent, which will return the dollar amount of costs per product.
-
Navigate to the properties of the productCountOutput element:
- Set the element’s type to int.
- In the Value field of its properties, type productCount — here we obtain the value of the corresponding variable defined in the Main agent, which will display the total number of products processed.
-
Navigate to the properties of the totalCostPerProductOutput element:
We will also include the existing cost structure stack chart into the model’s cloud version. This chart is already set up and does not require any modification at this time:

We have defined all the required elements for our model. We may now configure its export properties.
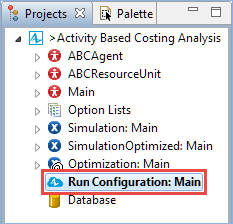
To configure the export properties, use the Run configuration editor.
To access the Run Configuration panel
-
Double-click the
 Run Configuration element in the model tree to open the Run configuration editor.
The editor panel is divided into two areas.
- The left area contains a tree of all the elements (divided into the Inputs and Outputs sections) that can be added to the cloud model.
- The right area contains the list of elements (divided into the Inputs and Outputs sections) that will be transferred to the Cloud upon exporting the current model to AnyLogic Cloud.
![]()
The elements that we add will be displayed in the Cloud’s model user interface. This will give us the ability to change the input parameters of the model and view the values of the outputs after running an experiment.
By default, the right area contains certain elements of the model. Now we will add the previously created Output elements to the right area of the editor.
To add an element
-
First, we will add the productCountOutput element. There are three alternative options of adding an element to the list of the to be exported elements:
-
Double-click the required element in the tree of elements. It will be added to the Outputs section, since it belongs to the Analysis palette.
- Drag-and-drop the required element from the tree to the Outputs section.
-
Right-click the required element and select Add from the context menu.
The added element will be highlighted in grey in the tree of elements. Its icon will now have a green checkmark, for example,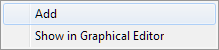
 .
.
-
Double-click the required element in the tree of elements. It will be added to the Outputs section, since it belongs to the
-
In the same way, add the totalCostPerProductOutput element to the Outputs section in the right area of the Run Configuration editor.
You can add several elements at once. Select them in the tree with the Ctrl or Shift key pressed, then either right-click and select Add from the context menu or instantly drag them from the tree to the required section.
Each added element is represented by a block containing information about it:
- Label — It will be shown instead of the Name value.
- Name — The name of the parameter or the Excel file.
- Value — Shows the value of the parameter with measurement units if specified, or the path to the MS Excel file.
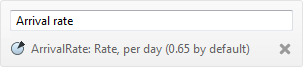
Let’s make the label of the totalCostPerProductOutput element more informative.
To set the text label for the element
- Click the text field within the totalCostPerProductOutput element’s block.
-
Edit the label. It should look like the one shown on the screenshot:

If you do not want to export an element to the Cloud, you can always remove it from the right area of the editor.
To remove an element from the exporting Inputs and Outputs
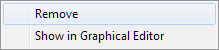
There are two alternative options of removing an element from the list of the to be exported elements:
- Click the
 button inside the element’s block.
 -
Right-click the element in the tree and select Remove from the context menu.
To remove several elements at once, select them in the tree with the Ctrl or Shift key pressed, then right-click a selected element and select Remove from the context menu.
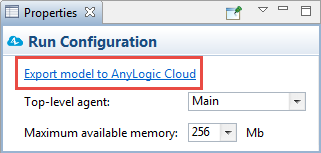
We may now export the model by clicking the Export model to AnyLogic Cloud link in the Run configuration editor properties:
The Export model to AnyLogic Cloud wizard will open up. If you are already registered in AnyLogic Cloud, enter your login information in the E-mail and Password fields and click Log in. Otherwise, you will have to register a new account by clicking the register new account link, which will lead you to the registration page in your browser.
To proceed with exporting the model through the wizard:
- Select Create new model in the Model drop-down list.
-
From the Icon list, select the image you want to display on the model tile in AnyLogic Cloud.
This option is only available the first time you export this particular model to AnyLogic Cloud.Here AnyLogic offers to select the presentation of the model’s top-level agent or one of the model’s experiments (except the custom experiment) as an image. The icon only displays the visible part of the presentation (area of the graphical diagram inside the model frame). You can change the icon to any other image in the model screen.
-
Remove the selection from the Include model source files option if you do not wish to export them.
If you choose to export the source files, the next step will allow you to select the files that will be exported.
-
Remove the selection from the Provide public access to this model checkbox if you do not want this model to be added to the Public models catalog. In this way you will export it as a private model, providing only certain users with access to it.
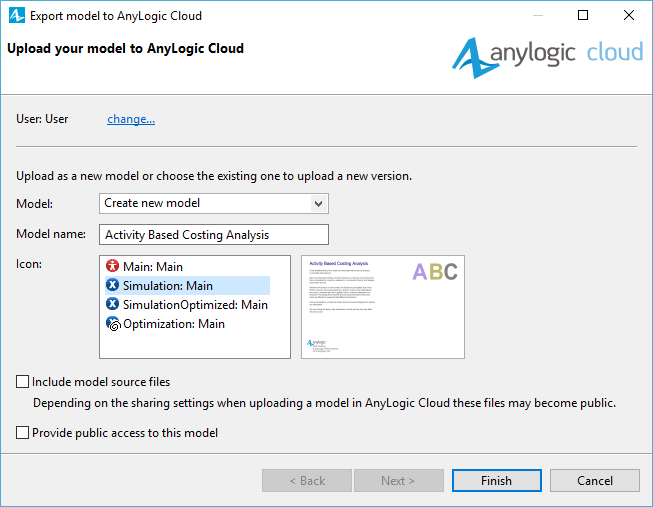
The model will be exported to the My models section of AnyLogic Cloud. After the process is finished, the AnyLogic Cloud model screen page will open in the browser automatically.
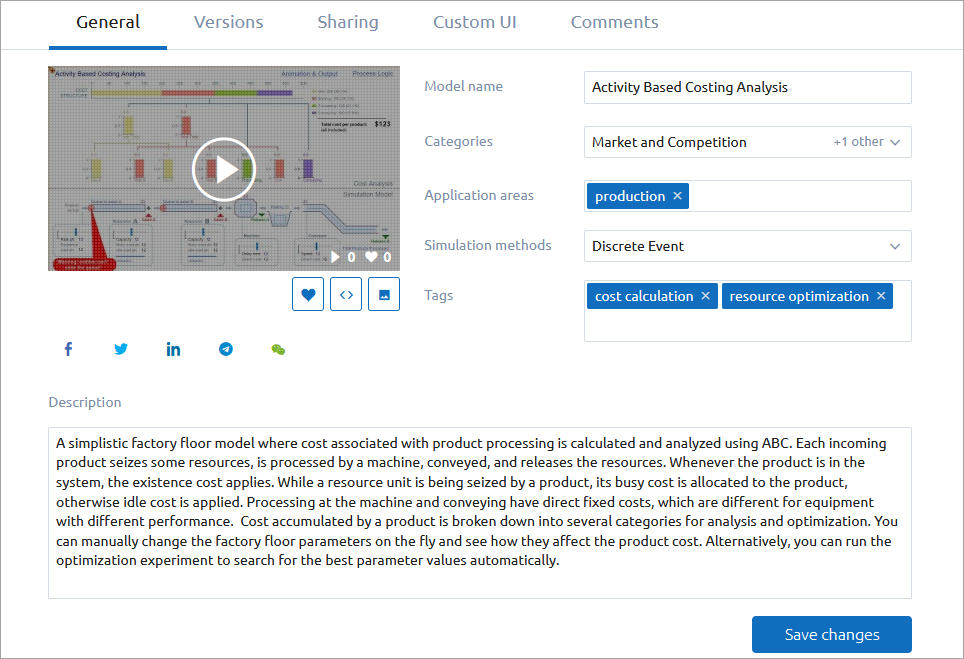
On the AnyLogic Cloud model screen, you can see the general information about the model:
In the sidebar on the left, you can see the model versions and experiments. Since it is the first time that we uploaded the model, a single model version is present, which contains a single simulation experiment:
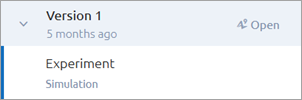
New model versions are added automatically when you export a model from AnyLogic as a new version of the existing model. Each model version can contain multiple experiments. To create a new experiment for the current model version, click the  button and set the experiment’s properties.
-
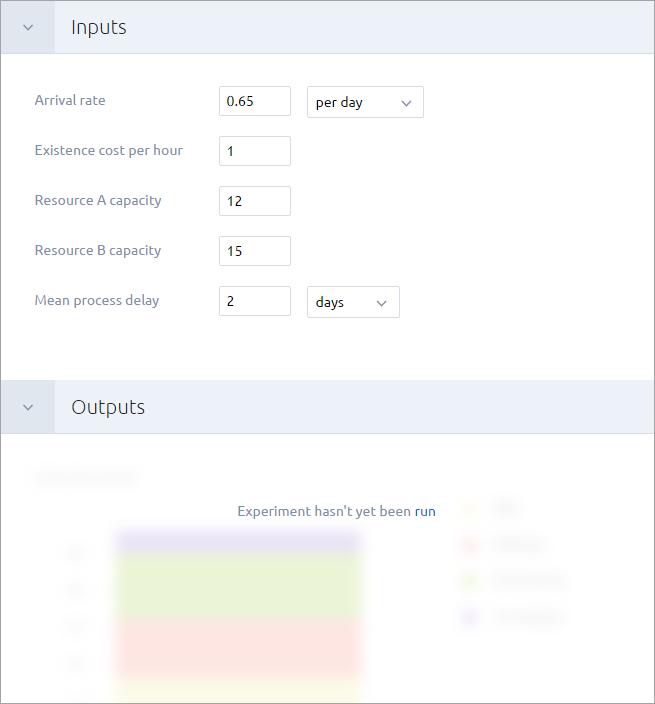
Click the experiment in the sidebar to open the experiment screen.
- The Inputs section lists the parameters that we have added to the model and allows for editing their values.
-
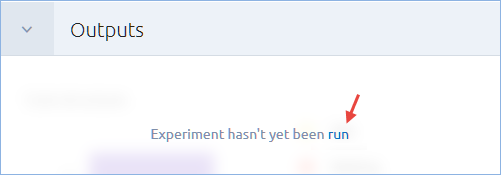
The Outputs section lists the outputs that we defined. Since we have not run an experiment yet, it looks blurry:
-
Run the experiment with the default input values by doing any of the following:
- Click the
 button in the experiment toolbar.
 -
Click the run link in the Outputs section.
- Click the
You can now change the values of the input parameters and run the experiment again to observe the changes in the model outputs.
This concludes the tutorial of bringing your model to AnyLogic Cloud. You can now proceed with creating new experiments and sharing your model with other users.
-
How can we improve this article?
-