

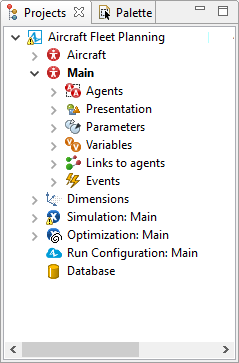
The Projects view provides access to the AnyLogic projects currently open in the workspace. The workspace tree provides easy navigation through the models. Since models are organized hierarchically, they are displayed in a tree structure: the model itself is the top level, agent types, experiments, the model’s database and file resources are the next level items, elements that make up the agent structure are organized in branches one level down, and so on. You can also add ![]() folders to keep
folders to keep ![]() Agent types,
Agent types,  Java classes, and
  Java interfaces organized.
By default, the Projects view is docked on the left side of the AnyLogic window.
 The Projects view
To show or hide the Projects view
-
Select View >
 Projects from the main menu.
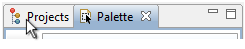
The Projects view shares the same area within the application window with the Palette view. When Palette or another view (such as Search) is shown there, simply click the Projects view tab to bring it to the top.
There are several common operations you can perform with items in the Projects view. You can copy, move, and delete tree items. This allows you to easily manage your projects. When copying or deleting, you should select the item.
To select the item
-
Click on the item.
If opened, the Properties view will display the properties of the selection.
To delete the item
-
Select Edit >
 Delete from the main menu, or
Right-click (macOS: Ctrl + click) the item and select Delete from the popup menu, or
Press Del.
To copy the item
-
Select Edit >
 Copy from the main menu, or
Right-click (macOS: Ctrl + click) the item and select Copy from the popup menu, or
Press Ctrl + C (macOS: Cmd + C).
To cut the item
-
Select Edit >
 Cut from the main menu, or
Right-click (macOS: Ctrl + click) the item and select Cut from the popup menu, or
Press Ctrl + X (macOS: Cmd + X).
To paste the item
-
Select the parent item you want to paste into.
For example, you can paste a rectangle in some agent type. -
Select Edit >
 Paste from the main menu, or
Right-click (macOS: Ctrl + click) the parent item and Select Paste from the popup menu, or
Press Ctrl + V (macOS: Cmd + V).
All model elements are present in the workspace tree and all changes you make when developing your model are immediately reflected there. When a new model is opened, a new model element is added to the workspace tree. By default, it contains only an agent class and a simulation experiment. As you develop your model and add new model elements, they are added to the appropriate branches of the tree.
Expand and collapse tree branches by clicking the plus  and minus
  icons.
To collapse all opened branches of the tree of models opened in the Projects view
- Right-click (macOS: Ctrl + click) any tree element and select Collapse All from the context menu.
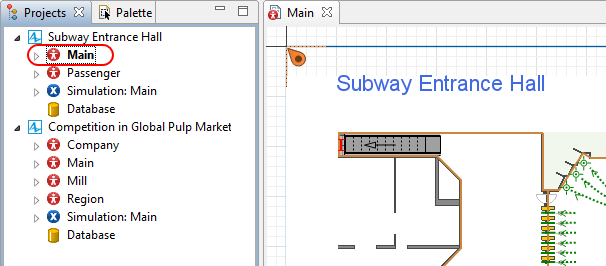
You may notice that an element of the tree (for example, an agent class, an experiment, a Java class, a Java interface, or a library) is highlighted in bold in the Projects view. This means that this particular element of the model is currently displayed in the editor. This feature can be very useful: for example, if you have opened several models, so that there are several Main agent types in the workspace, and you are not sure which particular Main type is currently open in the graphical editor:
8.9.4 and later versions of AnyLogic have additional controls available in the Projects view toolbar:
-
 Link with Editor — Shows and highlights the element selected in the graphical editor in the tree view.
-
 Filter — Enables filtering. Type your filter expression in the edit box above the tree view. The filter expression can match any part of an element name.
The following wildcard characters are supported: * (matches multiple characters), ? (matches a single character). -
 Collapse All — Collapses all expanded items in the tree view.
Starting with version 8.9.4, you can create folders to organize model items as needed. Folders can contain ![]() Agent types, Java classes, and Java interfaces.
Agent types, Java classes, and Java interfaces.
Folders are organized in alphabetical order, and they can have a hierarchical structure with multiple levels of nesting.
To create a new folder
-
Right-click (macOS: Ctrl + click) the model item in the Projects view and select New >
 Folder from the context menu.
-
Select the folder with a click and change its name in the Properties view.

To move model items to/from the folder
-
Drag the elements to/from the folder, or
Select the items that you wish to move and use Cut and Paste commands.Folders can contain only
 Agent types, Java classes, and Java interfaces.
-
How can we improve this article?
-