In AnyLogic you can create a number of agents of the same type simply by creating an agent population. You can build scalable systems by creating agent populations with the number of agents defined by a parameter of the model.
To create a population of agents
- Drag the Agent
 element from the Agent palette on the diagram of the agent type where you want to create the population of agents (usually — Main type). The New agent dialog box will open.
 -
Select Population of agents. The wizard will take you to the next step.
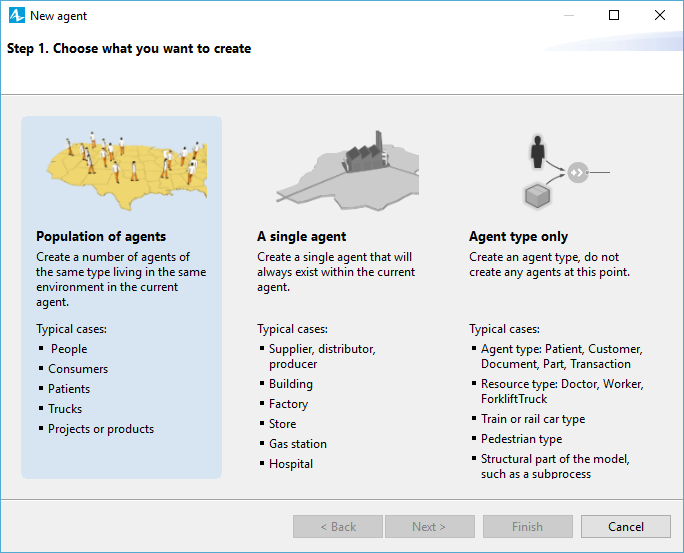
-
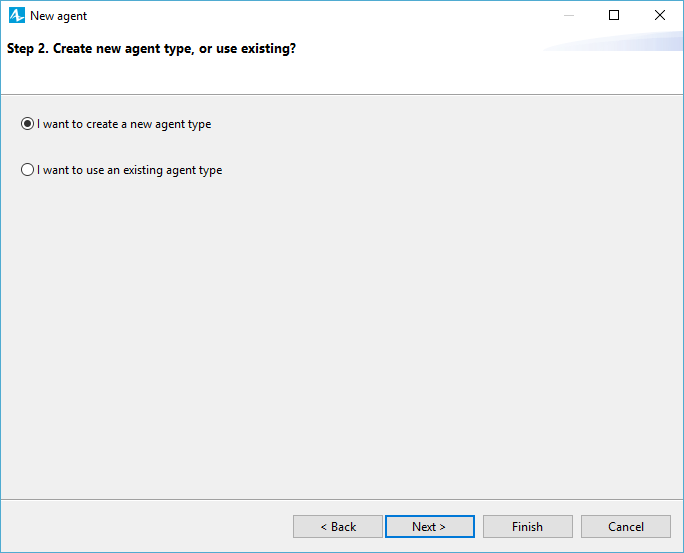
If you already have some custom agent types in your model, you will be asked whether you want to create a new type of agent (I want to create a new agent type option), or use the existing agent type (I want to use an existing agent type). Click Next.
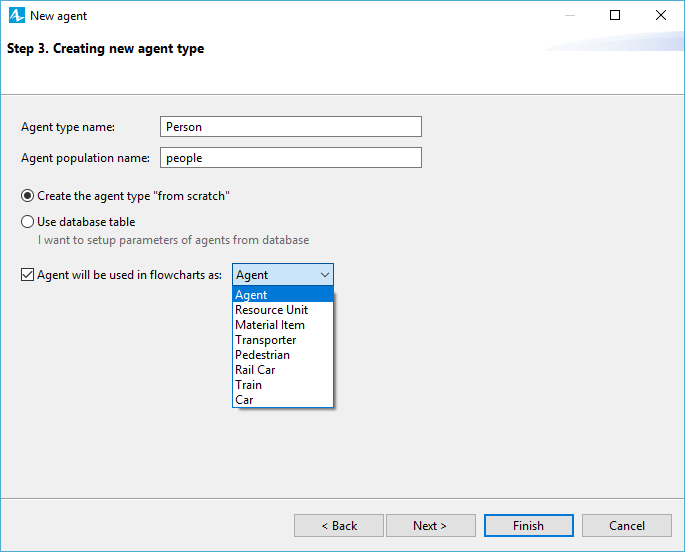
- Specify the Agent type name (e.g. Person). You will see that the Agent population name changes automatically.
- Choose whether you want to read agent attributes from database or create a new agent type “from scratch”.
-
If you plan to use the agents of this type in the flowcharts (e.g. in the Process Modeling Library flowchart, or as a pedestrian in Pedestrian Library flowchart), select the checkbox Agent will be used in flowcharts and then choose the role for this agent from the drop-down list on the right. Depending on the chosen role, you will obtain access to role-specific API which extends beyond the API of a generic agent type. Click Next.
-
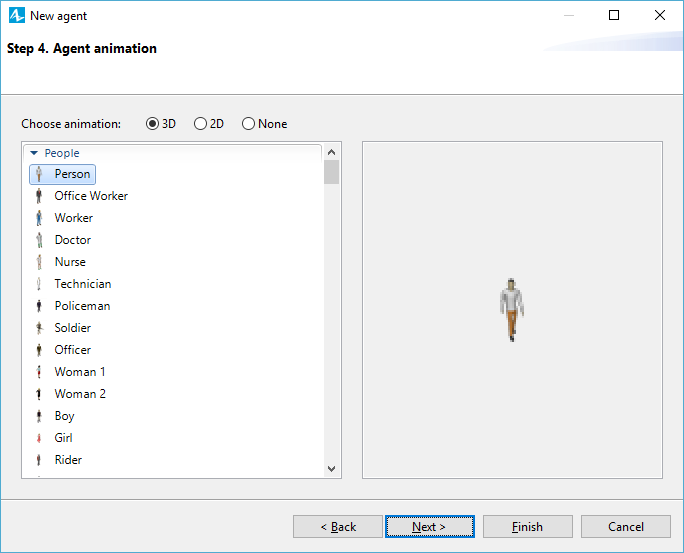
Specify the animation shape for the agents of this type. If you want the agents to be animated both in 2D and 3D, choose 3D and select the animation shape from the list below. If you need the shape that is shown in 2D only, choose 2D. Choose the shape from the list or, if no shapes satisfy your needs, choose None. You can draw animation of the agent type on its graphical diagram later. When done, click Next.
-
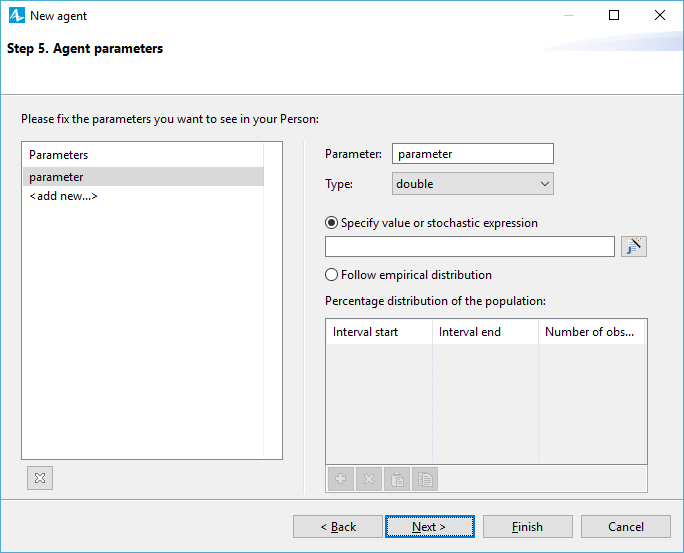
Specify the parameters for this agent type. Click <add new...> in the list on the left to create a new parameter. Having selected a parameter in this list, you can set its name, type, and initial value using the controls in the panel on the right. To remove the parameter, select it and click
 button at the bottom of the list. Click Next after you have finished defining the required parameters for this agent type.
-
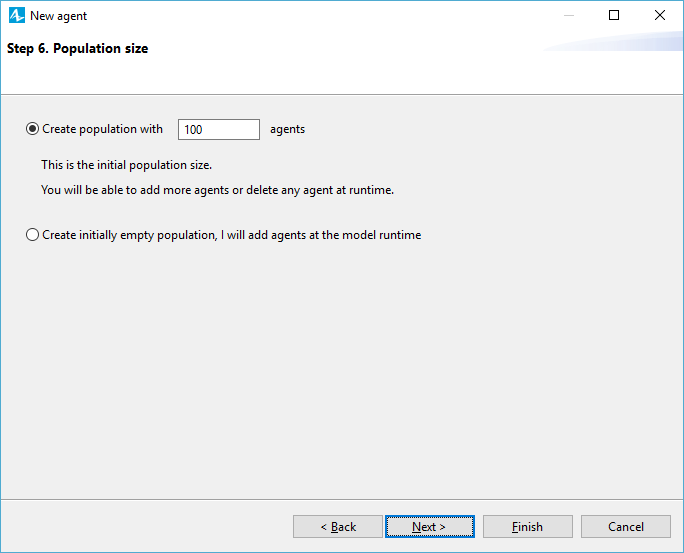
On the next page of the wizard you have to define the initial number of agents in the population. Choose whether you want to Create population with a specified number of agents, or you want to Create initially empty population and add agents later on dynamically (e.g. in the Startup code of Main), please refer here for details.
- Click Finish to end the process.
When finished, you will see the ![]() element on the diagram — it is an agent population. The population contains the specified number of agents — instances of the agent type. You can see the created agent type in the model tree (in the figure below it is
element on the diagram — it is an agent population. The population contains the specified number of agents — instances of the agent type. You can see the created agent type in the model tree (in the figure below it is ![]() Person):
Person):
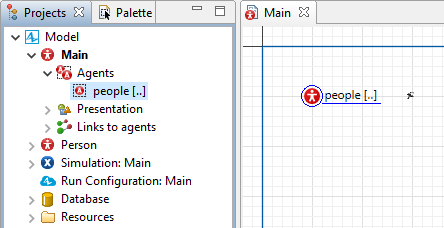
Open the diagram of this agent type by double-clicking it in the Projects view. You will see the animation and parameters you have chosen for this agent. You can add variables, parameters, statecharts, and any other elements defining the agent state and behavior.
You can specify any expression evaluating to integer type as a number of agents living in the population. Thus, you can parameterize the number of agents. You may need this to facilitate modifying the number of agents of several populations.
In order to access any individual agent from people population, you can use people(index) function, which takes an index of the agent in the vector, from 0 to people.size() - 1.
-
How can we improve this article?
-

