

Starting from version 8.9.7, AnyLogic enables a direct connection to be made from Omniverse to a running model using a special extension. This article describes how to set up and configure this connection.
To set up an Omniverse project
-
Download the NVIDIA Kit SDK from one of the following links:
Windows: https://catalog.ngc.nvidia.com/orgs/nvidia/teams/omniverse/resources/kit-sdk-windows
Linux: https://catalog.ngc.nvidia.com/orgs/nvidia/teams/omniverse/resources/kit-sdk-linux - Unzip the package to a folder on your PC.
- In the folder, launch new-project.bat.
-
When prompted by the installation script, specify the path to your Omniverse project and press Enter:
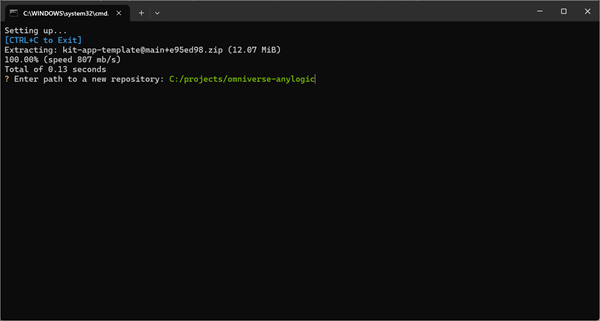
-
The project will then be created. Open the command line and navigate to the project folder. Once there, execute the following command:
Windows: repo.bat template new
Linux: repo.sh template new -
If this is the first time you are running the template new tool, you will be prompted to accept the Omniverse license terms. Navigate the controls using the arrow keys on your keyboard and confirm by pressing Enter.
Follow the subsequent steps and specify the metadata of your project. When asked to select the desired template, select Kit Base Editor.
When prompted to add application layers, decline. -
When you are finished, run the following command to build the new application:
Windows: repo.bat build
A notification will appear informing you of the successful build.
Linux: repo.sh build -
To launch the project you have just built, enter the following command:
Windows: repo.bat launch
Linux: repo.sh launch
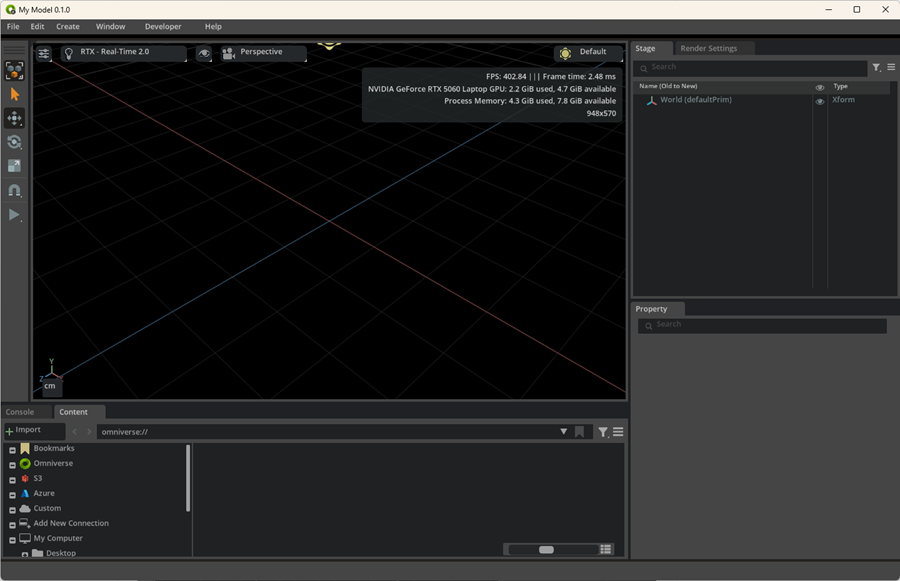
Depending on your configuration, the initial launch may take some time. Once complete, you will see the Omniverse editor application, and your instance will be ready to go.
You can download the connector plugin from the AnyLogic website.
Windows: https://files.anylogic.com/anylogic.connector-1.0.2%2Bwx64.r.zip
Linux: https://files.anylogic.com/anylogic.connector-1.0.2%2Blx64.r.zip
To configure Omniverse Kit to run AnyLogic models
- In the main menu of the Kit editor, go to Edit > Preferences.
- Locate and open the Rendering section.
-
Make sure the Enable Fabric delegate option is selected. This is required for integration with AnyLogic in this implementation because it uses Fabric technology to enable live streaming in Omniverse.
More information about Fabric can be found in the NVIDIA documentation.
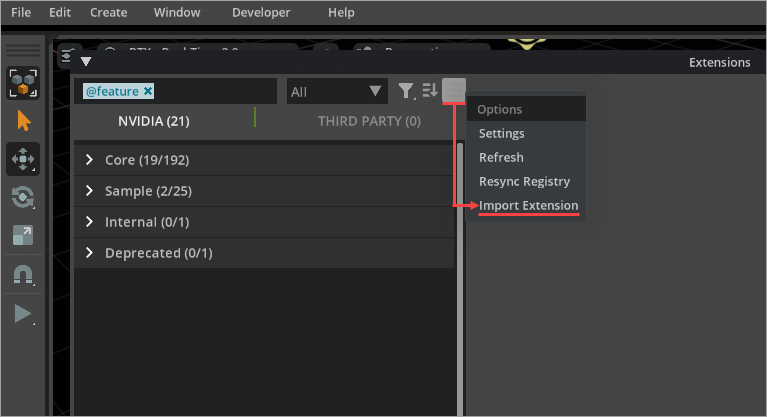
- In the main menu of the Kit editor, go to Developer > Extensions.
- Click Options.
-
Select Import Extension from the drop-down menu.
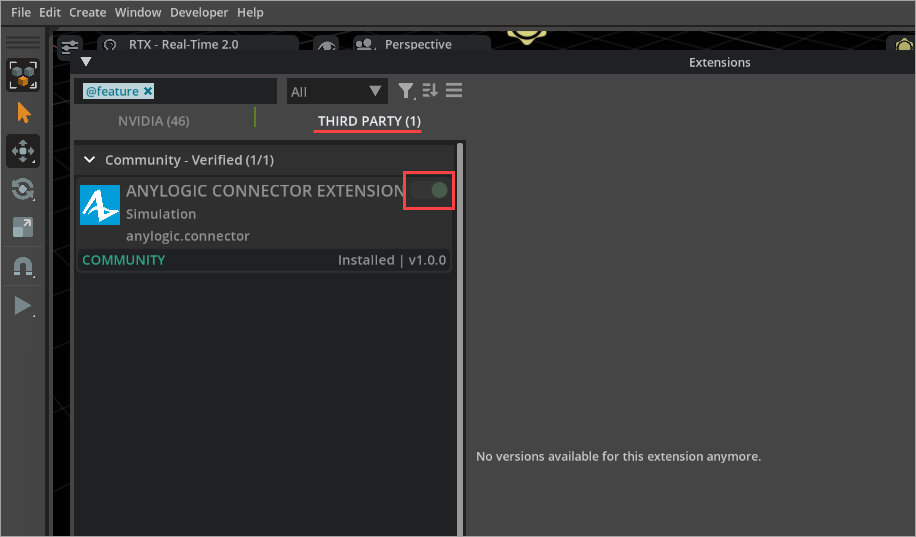
- In the subsequent dialog, select the extension you have downloaded from one of the links above.
-
After importing the extension, switch to the Third Party tab in the Extensions view of Omniverse Kit and enable the AnyLogic Connector extension.
 You can also click the extension in the list to enable autoload for it during Kit startup, or you can check the readme file and dependencies.
Now that this has been done, you can use the extension to launch your AnyLogic model in Omniverse.
To enable the extension view, select Window > AnyLogic Connector from the main menu of the NVIDIA Kit. Then, you can align the connector view inside the Kit editor as you see fit.
The extension supports two ways of launching the model: connecting to a running model or importing a standalone executable.
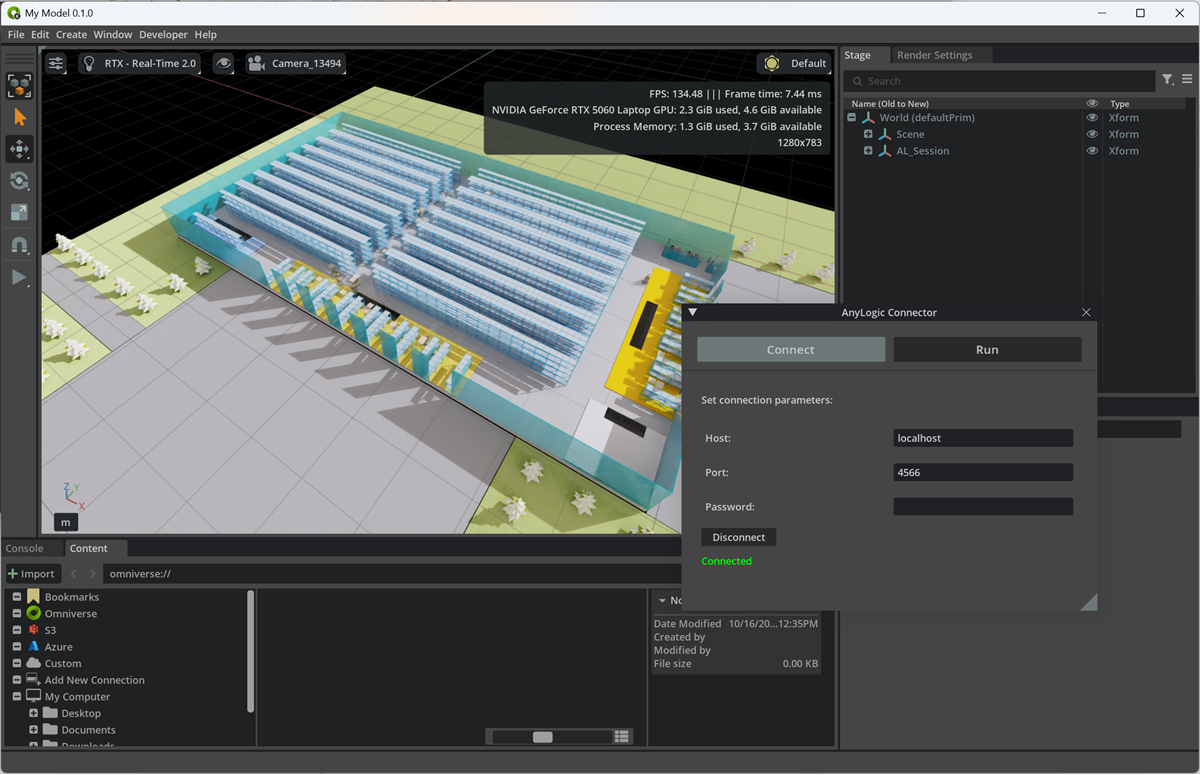
To connect to the running model
- Open the AnyLogic Connector extension.
- Select the Connect tab.
-
Specify the connection parameters:
- Host — The IP address or hostname of the machine where the model is running. It can be localhost.
- Port — The port of the machine where the model is launched, 4566 by default.
- Password — (Optional) The password you configured in the Omniverse connector in AnyLogic; see Customizing the connection.
- Click Connect.
That’s it. You are now connected to the running scene, and Kit is rendering the model data in real time. Use the standard AnyLogic engine controls to adjust the execution speed or interact with the built-in model controls to dynamically modify parameters such as the number of transporters or the intensity of pedestrian flow. All changes are immediately reflected in the Kit window.
Click Disconnect to stop the real-time rendering at any time.
To import a model from a standalone executable
- Open the AnyLogic Connector extension.
- Select the Run tab.
- Click Browse and locate the executable file for the standalone model. Depending on the operating system, it wil be either a BAT or an SH file.
-
Kit will then attempt to connect to the model. If successful, the scene will be displayed in the editor.
To launch and control the scene, use the controls available at the bottom of the extension view:
 — Starts or pauses the execution.
-
 — Sets the model execution to its default speed.
-
 — Decreases the execution speed.
-
 — Increases the execution speed.
- When finished your work, click Terminate to disconnect the model from Omniverse and stop the rendering.
-
How can we improve this article?
-