

AnyLogic provides users with the easy mechanism of integrating AnyLogic models with external Java applications. External applications can integrate with databases, external files and other applications. This enables users to embed simulation models in more complex decision-making systems.
AnyLogic comes with a set of special How To models demonstrating different integration scenarios and containing code that can be used as a starting point in case you need some particular integration case and want to develop the given solution further in your Java project.
- Launch AnyLogic model from external Java application. Application launches AnyLogic model so that its model window is displayed in a standalone window.
- Run the model from external application without UI. Application runs the model, but the model window is not created, so that the model is run in the fast mode without animation.
If you are interested in some integration scenario, you can consult the corresponding help document and reuse the code from the how-to model by following the detailed explanations given in the document.
AnyLogic provides users with the easy mechanism of integrating AnyLogic models with external Java applications.
This integration case is implemented in the following how-to model:
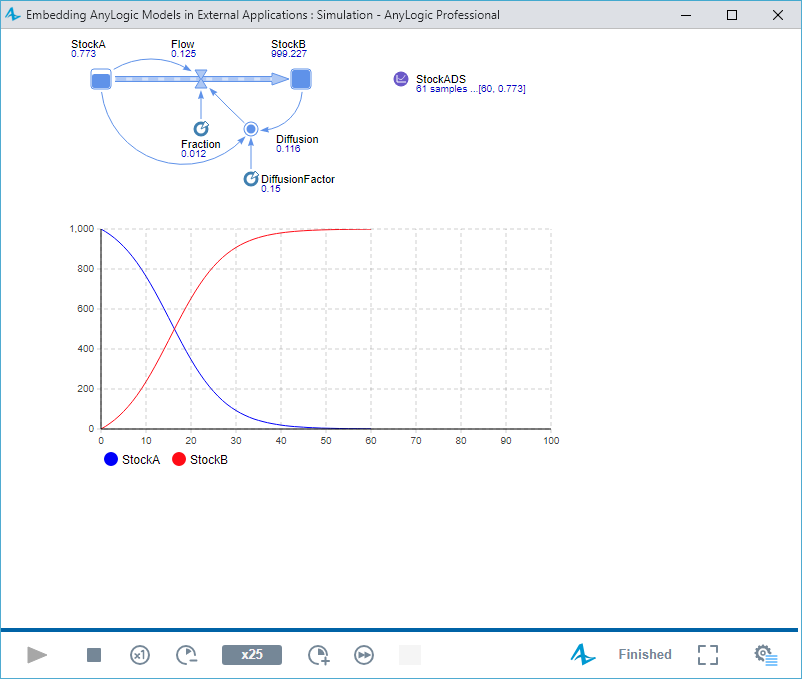
Demo model: Launching AnyLogic Model from External Application Open the model page in AnyLogic Cloud. There you can run the model or download it (by clicking Model source files). Demo model: Launching AnyLogic Model from External ApplicationOpen the model in your AnyLogic desktop installation.Let's study what should be done to launch the model from external Java application so that its model window is shown. Please open this how-to model by clicking the link given above. Study the model inner structure.
The model contains:
- Agent type Main defining the model logic.
- Simulation experiment Simulation. Launching this experiment in AnyLogic you run the model so that its model window is displayed. We want to run the model in the same manner, but from some external application.
- Java class MyApplication. It plays a role of an external Java application and contains code that application should contain to run simulation experiment of AnyLogic model with model window shown.
Open MyApplication Java class by double-clicking it in the Projects view. You will see the following code there:
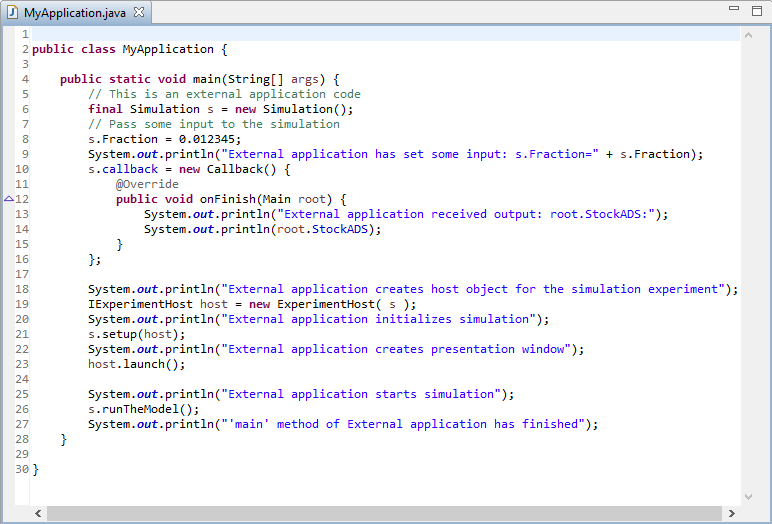
System.out.println() calls just output some information about the model run progress, so you should pay your great attention here to the following lines.
First of all:
final Simulation s = new Simulation();
Here the constructor of the simulation experiment named Simulation is called.
Next, we call the constructor to create a host object for the simulation experiment:
IExperimentHost host = new ExperimentHost( s );
Then you may notice the following functions being called:
s.setup(host);
  host.launch();
The setup() function of the experiment performs the initialization of the simulation. We pass the host object created before as an argument of this function.
The launch() function creates the model presentation window.
Finally the experiment function runTheModel() is called. This function is declared right in the model, you can find it on the simulation experiment's diagram. It runs the model and shows the presentation of the model's top level agent in the model window.
You can also see that you can easily set up experiment parameter values — they are accessible as experiment fields simply by their names. Here we set 0.012345 as the value of Fraction parameter by writing s.Fraction=0.012345;.
To check how this integration scenario works
- Open this how-to model and export it as standalone application.
- Modify bat/sh/cmd file by changing class name from Simulation to MyApplication.
- Run the bat/sh/cmd file and see how it works.
If you want to use the described technique in your application and continue developing it further in some Java IDE, follow the steps described below. We will describe how to apply this solution in Java project created in Java IDE Eclipse. If you do not have Java project in Eclipse, create it as described in the online help documentation on the Eclipse website.
To use the described technique in your Java application
- First of all we need to export the model as standalone application (we recommend to export the model directly to the folder of your Java project).
-
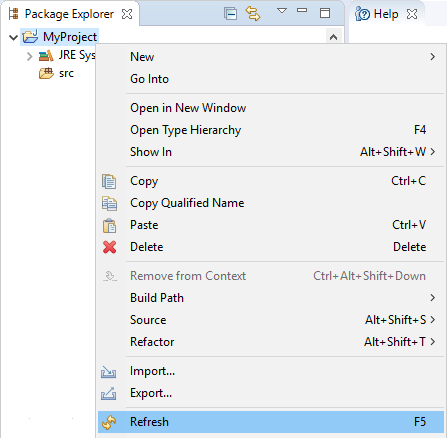
Add the .jar files created on the model export to your Java project. Therefore first refresh the project tree by right-clicking (macOS: Ctrl + clicking) the project item in the tree and choosing the Refresh command from the pop-up menu.
-
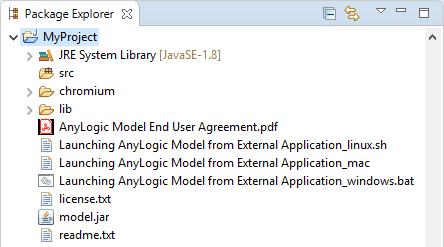
Now you will see new files appeared in the project folder.
-
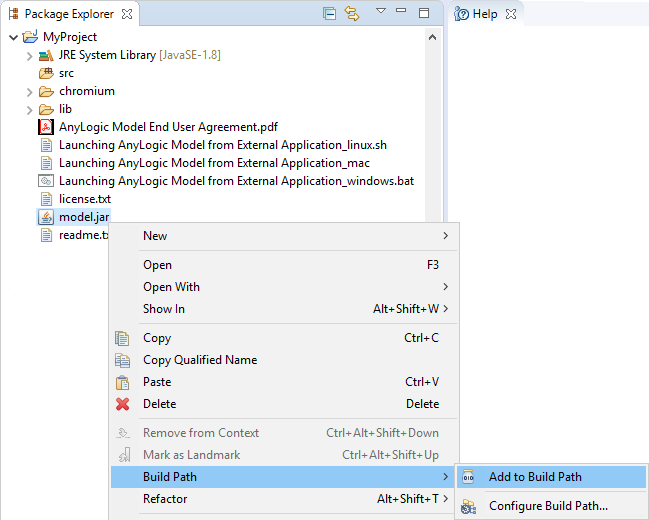
Select compiled .jar file of the model (model.jar) and choose Build path > Add to build path from the context menu. Do not add the bat/cmd/sh files since their purpose is just to launch the exported model and we do not need them in our project.
-
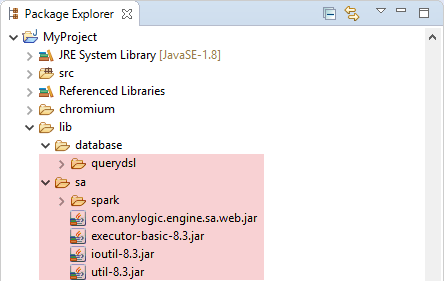
In the same manner add all .jar files required for successful model compilation. The folders that contain them are highlighted in the image below. Expand each folder in Package Explorer and select all .jar files inside to add them to build path:
- Import the package required to setup the model application by typing the following line in the very beginning of the class code in your project:
import com.anylogic.engine.gui.*;
You can use the usual Code Completion (displayed on pressing Ctrl + Space) while typing code in Eclipse. -
Import the package containing the model classes. Type the following code in the next line:
import <model_package_name>.*;
(You can find the model package name in the Advanced properties section of the AnyLogic model)
In this particular case we will type: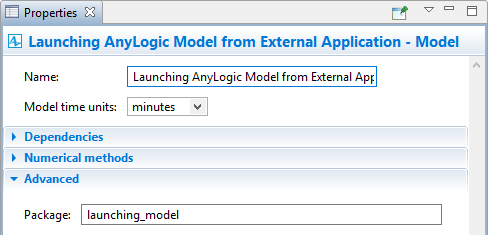
import launching_model.*;
The class code of your project should look as follows: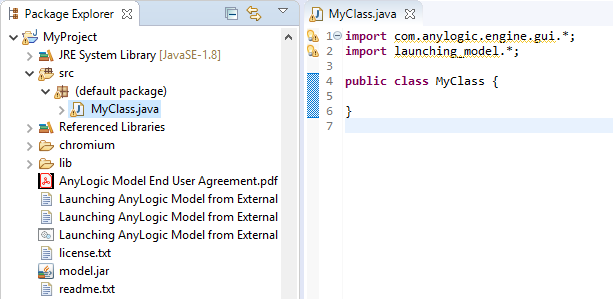
-
Now you can refer to model classes in the code of your project. The easiest way to implement the described solution is just to copy the function main() from the model's Java class MyApplication into the class of your Java project:
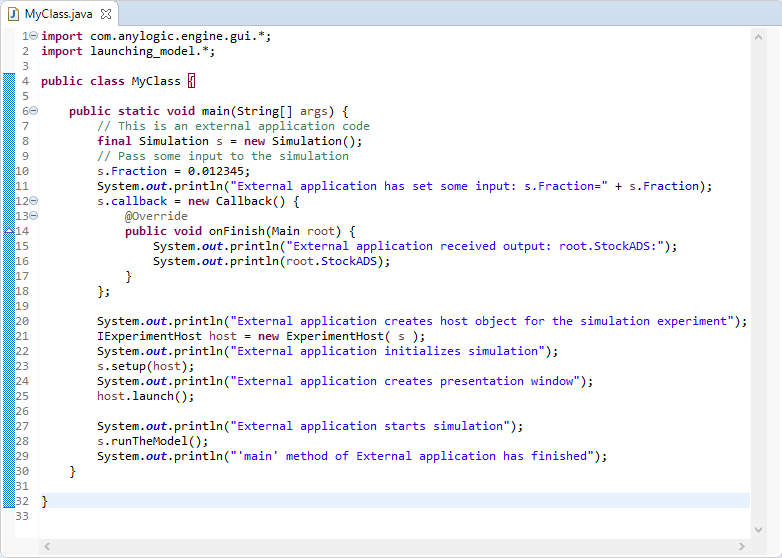
That's all, now you can run the class as Java application. You will see that the launched application opens the model window. It is the usual model window, that is created and displayed on the model run.
You can see the output information displayed in the Eclipse Console view.
This integration case is implemented in the following how-to model:
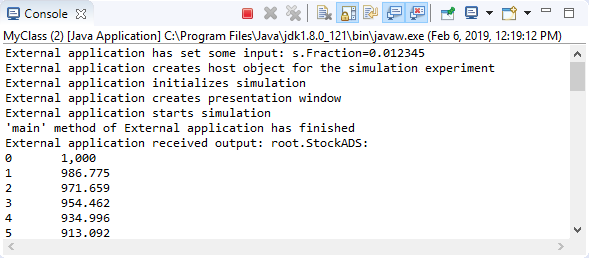
Demo model: Running the Model from Outside Without Presentation Window Open the model page in AnyLogic Cloud. There you can run the model or download it (by clicking Model source files). Demo model: Running the Model from Outside Without Presentation WindowOpen the model in your AnyLogic desktop installation.Let's study what should be done to make the model run without model window from external Java application. Open this how-to model by clicking the link above. Study the model's inner structure.
The model contains:
- Agent type Main defining the model logic. The model has one parameter and returns the simulation result.
- Custom experiment CustomExperiment. Launching this experiment in AnyLogic you run the model without displaying model window. We want to run the model in the same manner, but from some external application.
- Java class MyApplication. It plays a role of an external Java application and contains minimum code that the application should contain to run custom experiment of AnyLogic model.
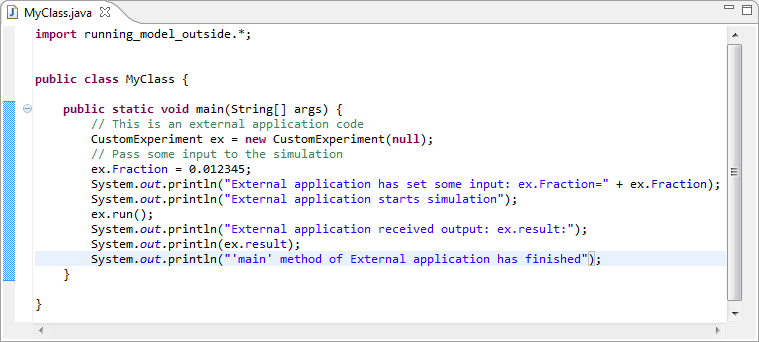
Open MyApplication Java class by double-clicking it in the Projects view. You will see the following code there:
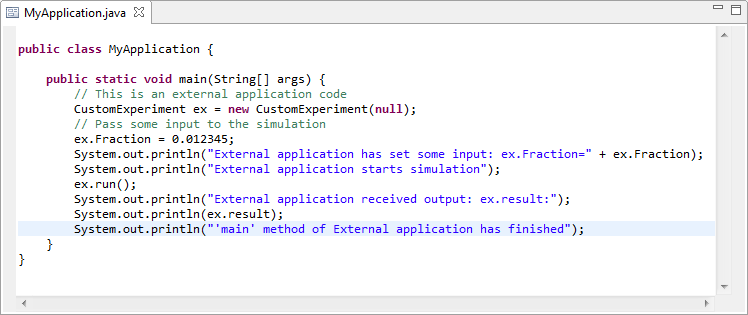
System.out.println() calls just output some information about the model run progress, so you should pay your great attention here to just two lines.
First of all, to the line CustomExperiment ex = new CustomExperiment(null); Here the constructor of the custom experiment named CustomExperiment is called.
This constructor has the argument that accepts the parent of this custom experiment - in case you call the custom experiment from simulation experiment, you should pass the link to this simulation experiment as the argument of the custom experiment's constructor.
Another important line of code is ex.run(). Here we run the created experiment ex by calling its function run().
Also you can see that you can easily set up experiment parameter values — they are accessible as experiment fields simply by their names. Here we set 0.012345 as the value of Fraction parameter by writing ex.Fraction=0.012345;.
To check how this integration scenario works
- Open this how-to model and export it as standalone application.
- Modify bat/sh/cmd file by changing class name from CustomExperiment to MyApplication.
- Run the bat/sh/cmd file and see how it works.
If you want to use the described technique in your application and continue developing it further in some Java IDE, please follow the steps described below. We will describe how to apply this solution in Java project created in Java IDE Eclipse. If you do not have Java project in Eclipse, create it as described in the online help documentation on the Eclipse website.
To use the described technique in your Java application
- First of all we need to export the model as standalone application (we recommend to export the model directly to the folder of your Java project).
-
Add the .jar files created on the model export to your Java project. Therefore first refresh the project tree by right-clicking (macOS: Ctrl + clicking) the project item in the tree and choosing the Refresh command from the pop-up menu.
-
Now you will see new files appeared in the project folder.
-
Select compiled .jar file of the model (model.jar) and choose Build path> Add to build path from the context menu. Do not add the bat/cmd/sh files since their purpose is just to launch the exported model and we do not need them in our project.
-
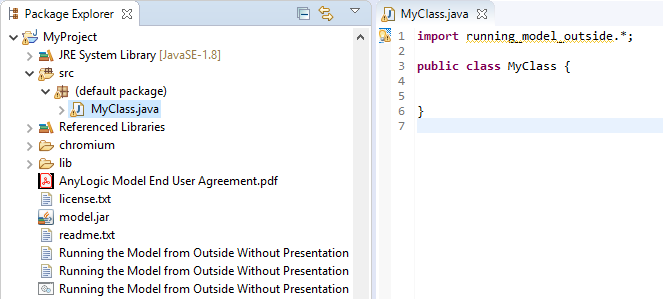
In the same manner add all .jar files required for successful model compilation. The folders that contain them are highlighted in the image below. Expand each folder and select all .jar files inside to add them to build path:
-
Import the package containing the model classes by typing the following line in the very beginning of the class code in your project:
import <model_package_name>.*;
(You can find the model package name in the Advanced properties section of the AnyLogic model)
So, in this particular case we will type: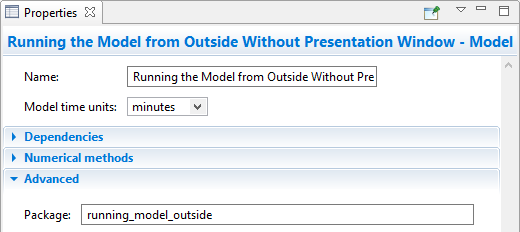
import running_model_outside.*;
 You can use usual Code Completion (displayed on pressing Ctrl + Space) while typing code in Eclipse.
 -
Now you can refer to model classes in the code of your project. The easiest way to implement the described solution is just to copy the function main() from the model's Java class MyApplication into the class of your Java project:
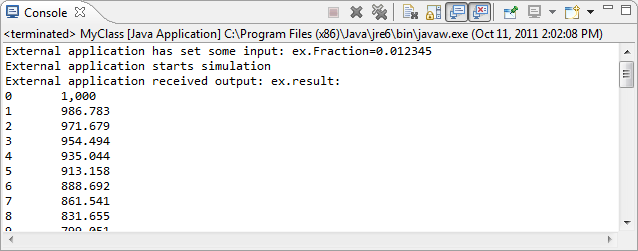
That's all, now you can check how it works - run the class as Java application. You will see that the custom experiment was run but the model window was not shown. You can see the output information displayed in the Eclipse Console view.
-
How can we improve this article?
-