

AnyLogic affords an opportunity to run model with different model parameters and analyze how some certain parameters affect the model behavior. You don’t need to run your model several times one by one, and change parameter values manually after each model run, trying to remember the results of these runs and compare them. Using the parameter variation experiment you can configure the complex model simulation comprising several single model runs, varying one or more root object parameters. Running this experiment with fixed parameter values you can also assess the effect of random factors in stochastic models. AnyLogic supports tools for observing and analyzing the model behavior. You can display the results of several model runs on one diagram and compare the model behavior with different values of parameters.
You can control the Variation experiment with Java code. Refer to the parameter variation experiment functions section for details.
To run the parameter variation
- Create new parameter variation experiment.
- Configure this experiment, i.e. choose the parameters you want to vary and define the values these parameters should take during the specified number of model runs.
- Create the default UI for the experiment.
- Run the experiment.
To create a parameter variation experiment
- In the Projects view, right-click (macOS: Ctrl + click) the model item and choose New >
 Experiment from the popup menu. The New Experiment dialog box is displayed.
 - Choose
 Parameter Variation option in the Experiment Type list.
 - Type the experiment name in the Name box.
- Choose the top-level agent of the experiment from the Top-level agent drop-down list.
- If you want to apply model time settings from another experiment, leave the Copy model time settings from check box selected and choose the experiment in the drop-down list to the right.
- Click Finish.
- General
-
Name — The name of the experiment.
Since AnyLogic generates Java class for each experiment, please follow Java naming guidelines and start the name with an uppercase letter.Ignore — If selected, the experiment is excluded from the model.
Top-level agent — Using the drop-down list, choose the top-level agent type for the experiment. The agent of this type will play a role of a root for the hierarchical tree of agents in your model.
Maximum available memory — The maximum size of Java heap allocated for the model.
Create default UI — The button creates the default UI for the experiment.
- Parameters
-
Parameters — Here you can select how the parameters will be varied: in the specified range, or freely.
Varied in range — If selected, you should explicitly define the range of values for each parameter you want to vary. Namely, you define minimum and maximum values for a parameter and also the step this parameter will increase its value to reach the maximum.
Exactly this option should be selected for the parameter variation experiment.Freeform — If selected, model is run for the fixed number of iterations you specify below in the Number of runs field and the parameter values are calculated according to the expressions you define.
This option should be selected if you need Monte Carlo or sensitivity analysis experiment.Number of runs — [Applied if the Parameters: Freeform option is selected above] Defines how many times the experiment will run the model with different parameter values.
In the table you can define the set of varied parameters. The table lists all the parameters of the top-level agent. To make a parameter a decision variable, click in the Type field and choose range there. If it is a numeric parameter, then specify the range for the parameter. Enter the parameter’s lower bound in the Min field, the parameter’s upper bound in the Max field, and specify the increment value in the Step field. shows all the parameters of the top-level agent.
For each parameter in the Expression column, you can specify a (usually stochastic) expression, according to which the value of this parameter will be calculated during the next “run” of the model by this experiment. Using the index keyword in the expression you can refer to the current model run number.
If the Parameters: Freeform option is selected above, then instead of the columns mentioned above, the Expression column will be shown. There you can set an expression for each parameter, according to which the value of the parameter will be calculated (but this is the case of other experiments - Monte Carlo and sensitivity analysis experiment).
- Model time
-
Stop — Defines, whether the model will Stop at specified time, Stop at specified date, or it will Never stop. In the first two cases, the stop time is specified using the Stop time/Stop date controls.
Start time — The initial time for the simulation time horizon.
Start date — The initial calendar date for the simulation time horizon.
Stop time — [Enabled if Stop is set to Stop at specified time] The final time for the simulation time horizon (the number of model time units for model to run before it will be stopped).
Stop date — [Enabled if Stop is set to Stop at specified date] The initial calendar date for the simulation time horizon.
Additional experiment stop conditions — Here you can define any number of additional experiment stop conditions. When any of these conditions will become true, experiment will be stopped. Condition can include checks of dataset mean confidence, variable values, etc. The top-level agent of the experiment can be accessed here as root, so if you want e.g. to stop the experiment when the variable plainVar of the experiment’s top-level agent steps over the threshold, type here, say, root.plainVar>11. To make the condition active, select the checkbox in the corresponding row of the table.
- Randomness
-
Random number generator — Here you specify, whether you want to initialize random number generator for this model randomly or with some fixed seed. This makes sense for stochastic models. Stochastic models require a random seed value for the pseudorandom number generator. In this case model runs cannot be reproduced since the model random number generator is initialized with different values for each model run. Specifying the fixed seed value, you initialize the model random number generator with the same value for each model run, thus the model runs are reproducible. Moreover, here you can substitute AnyLogic default RNG with your own RNG.
- Random seed (unique simulation runs) — If selected, the seed value of the random number generator is random. In this case random number generator is initialized with the same value for each model run, and the model runs are unique (non-reproducible).
- Fixed seed (reproducible simulation runs) — If selected, the seed value of the random number generator is fixed (specify it in the Seed value field). In this case random number generator is initialized with the same value for each model run, and the model runs are reproducible.
-
Custom generator (subclass of Random) — If for any reason you are not satisfied with the quality of the default random number generator Random, you can substitute it with your own one. Just prepare your custom RNG (it should be a subclass of the Java class Random, e.g. MyRandom), choose this particular option and type the expression returning an instance of your RNG in the field on the right, for example: new MyRandom() or new MyRandom( 1234 ).
You can find more information in Custom number generator.
- Replications
-
Use replications — If selected, the engine will run several replications per one simulation. You need this when your model contains stochastics. In such cases, the results of the simulation runs are unique and the values of the optimized function which are obtained for the simulation runs executed with the same values of optimization parameters most likely differ from each other. We cannot execute only one simulation run, accept its results as the current iteration result and proceed with optimization by checking other parameter values. To obtain reliable representative data, we need to execute several runs (called “replications” here) for a single set of parameter values and accept the mean of all replications results as the values of the objective.
Fixed number of replications — If selected, fixed number of replications will be run per each simulation.
- Replications per iteration — [enabled if Fixed number of replications is set] the fixed number of replications, which will be run per each simulation.
Varying number of replications (stop replications after minimum replications, when confidence level is reached) — if selected, varying number of replications will be run per each simulation. When running a varying number of replications, you will specify minimum and maximum number of replications to be run. The engine will always run the minimum number of replications for a solution. Then, the engine determines if more replications are needed. The engines stops evaluating a solution when one of the following occurs:
- The true objective value is within a given percentage of the mean of the replications to date.
- The current replication objective value is not converging.
- The maximum number of replications has been run.
For this property, the following options are available:
- Minimum replications — [enabled if Varying number of replications is set] The minimum number of replications the engine will always run per one simulation.
- Maximum replications — [enabled if Varying number of replications is set] The maximum number of replications the engine can run per one simulation.
- Confidence level — [enabled if Varying number of replications is set] The confidence level to be evaluated for the objective.
- Error percent — [enabled if Varying number of replications is set] The percent of the objective for which the confidence level is determined.
- Window
-
Window properties define the appearance of the model window, that will be shown, when the user starts the experiment.
The size of the experiment window is defined using the model frame and applies to all experiments and agent types of the model.Title — The title of the model window.
Enable zoom and panning — If selected, the user will be allowed to pan and zoom the model window.
Enable developer panel — Select/clear the checkbox to enable/disable the developer panel in the model window.
Show developer panel on start — [Enabled only if the Enable developer panel checkbox is selected] If selected, the developer panel will be shown by default in the model window every time you run the experiment.
- Java actions
-
Initial experiment setup — The code executed on experiment setup.
Before each experiment run — The code executed before each simulation run.
Before simulation run — The code executed before simulation run. This code is run on setup of the model. At this moment the top-level agent of the model is already created, but the model is not started yet. You may perform here some actions with elements of the top-level agent, e.g assign actual parameter values here.
After simulation run — The code executed after simulation run. This code is executed when simulation engine finishes the model execution (Engine.finished() function is called). This code is not executed when you stop your model by clicking the Terminate execution button.
After iteration — The code executed after iteration run.
After experiment — The code executed after experiment run.
- Advanced Java
-
Imports section — import statements needed for correct compilation of the experiment class’ code. When Java code is generated, these statements are inserted before definition of the Java class.
Additional class code — Arbitrary member variables, nested classes, constants and methods are defined here. This code will be inserted into the experiment class definition. You can access these class data members anywhere within this experiment.
Java machine arguments — Specify here Java machine arguments you want to apply on launching your model. You can find the detailed information on possible arguments at Java Sun Microsystems website: https://docs.oracle.com/javase/1.5.0/docs/tooldocs/windows/java.html.
Command-line arguments — Here you can specify command line arguments you want to pass to your model. You can get the values of passed argument values using the String[] getCommandLineArguments() method from any code field of your choice. The only exception is values of static variables since these are initialized before the experiment class itself.
- Advanced
-
Allow parallel evaluations — If the option is selected and the processor has several cores, AnyLogic will run several experiment iterations in parallel on different processor cores. Thereby performance is multiply increased and the experiment is performed significantly quicker. This feature is made controllable because in some rare cases parallel evaluations may affect the optimizer strategy so that more iterations are required to find the optimal solution.
Do not use static variables, collections, table functions, and custom distributions (check that their advanced option Static is deselected), if you turn on parallel evaluations here.Load top-level agent from snapshot — If selected, the experiment will load the model state from the snapshot file specified in the control to the right. The experiment will be started from the time when the model state was saved.
AnyLogic supports two modes of varying parameters:
- Varying in range. You explicitly define the range of values for each parameter you want to vary. Namely, you define minimum and maximum values for a parameter and also the step this parameter will increase its value to reach the maximum.
- Freeform varying. Model is run for the fixed number of iterations you specify. Parameter values are calculated according to the expressions you define. Using the index keyword in the parameter value expression you can refer to the current model run number. Thus this mode also allows defining dependencies between the parameter value and other parameters and/or the number of the current model run.
You may vary only the parameters of the top-level agent. If you want to vary the parameters of encapsulated objects, you should use parameter propagation.
To configure parameter variation
- Select the parameter variation experiment in the Projects view.
- Go to the Parameters section of the Properties view.
- Select, whether you want parameters to be Varied in range or Freeform varied. If you choose Freeform, specify how many times this experiment will run the model in the Number of runs edit box below.
-
Parameters to vary are defined in the Parameters table. This table lists all parameters of the top level agent. Each parameter is defined in the individual table row.
- If you set your parameters to be Freeform varied, you should specify values for all parameters of the top level agent in the Expression column. It can be either a fixed value, or an expression evaluating the actual parameter value. In this expression you can refer to the current model run number using the index keyword.
- Otherwise, if you set your parameters to be Varied in range, you should change the Type of all parameters you want to vary from Min, Max and Step values for each varied parameter.
Just as simulation experiment, parameter variation experiment has its own presentation drawn on the graphical editor diagram. By default, the diagram is empty. However, AnyLogic offers the user an ability of creating some default UI for parameter variation experiment. We advice you to start with creating the default UI and then adjust it somehow to satisfy your requirements.
To create the default experiment UI
- Select the experiment in the Projects view.
- Go to the Properties view.
- Click the Create default UI button.
This creates default UI for the experiment as shown in the figure below.
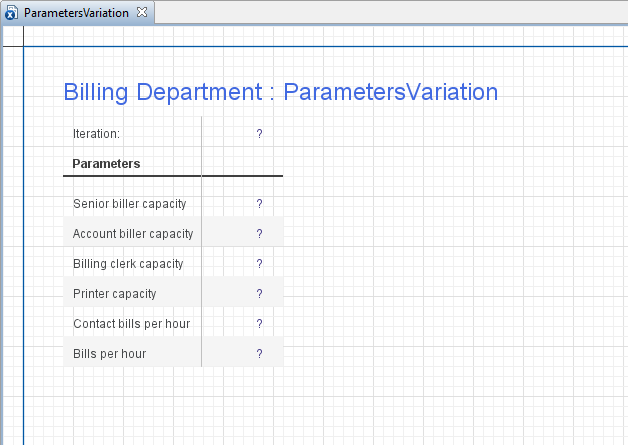 The default UI created for parameter variation experiment
The default UI consists of a number of controls displaying all necessary information regarding the current status of the variation process.
The table at the left displays all necessary information about the parameter variation process: the number of the current Iteration and the current Parameter values being used at the moment.
The experiment is run by clicking the Run button situated on the control panel of the model window.
If your model is stochastic, the results of the single model run may not be representative. Therefore AnyLogic supports results of the iteration that are based on experimentation through the General Replication Algorithm. This feature allows the user to provide the AnyLogic Engine with results of multiple replications per simulation/iteration.
AnyLogic allows you to run a fixed number of replications per simulation or a varying number of replications per simulation.
When running a fixed number of replications, you explicitly define the number of replications to be run for every iteration.
The varying replications option allows AnyLogic to test for the statistical significance of the results. You are supposed to define confidence level, and some expression on which AnyLogic collects statistics, e.g. some variable from your Main agent. AnyLogic will always run the minimum number of replications. Then it will analyze the expression and calculate a confidence interval with the confidence level. Replications will be stopped if:
- the confidence interval is small enough to fit in the given percentage of expression value, or
- current expression value is not inside the mean confidence interval (not near the mean value), or
- the maximum number of replications is run.
 Parameter variation experiment’s properties view
To schedule fixed number of replication
- In the Projects view, select the parameter variation experiment.
- In the Replications section of the Properties view, select the Use Replications check box.
- Select the Fixed number of replications option.
- Specify the number of Replications per iteration in the box.
To schedule varying number of replications
- In the Projects view, select the parameter variation experiment.
- In the Replications section of the Properties view, select the Use Replications check box.
- Select the Varying number of replications (Stop replications after minimum replications, when confidence level is reached) option.
- Specify the minimum number of replications in the Minimum replications box.
- Specify the maximum number of replications in the Maximum replications box.
- Define the Confidence level to be evaluated for the expression you define.
- Specify the percent of mean for which the confidence level is determined in the Error percent field.
You can use the following functions to control the parameter variation experiment, retrieve the data on its execution status, and use it as a framework for creating custom experiment UI.
- Controlling execution
-
Function Description void run() Starts the experiment execution from the current state.
If the model does not exist yet, the function resets the experiment, creates and starts the model.void pause() Pauses the experiment execution. void step() Performs one step of experiment execution.
If the model does not exist yet, the function resets the experiment, creates and starts the model.void stop() Terminates the experiment execution. void close() This function returns immediately and performs the following actions in a separate thread: - Stops experiment if it is not stopped,
- Destroys the model,
- Closes the experiment window (only if the model is started in the application mode).
Experiment.State getState() Returns the current state of the experiment: IDLE, PAUSED, RUNNING, FINISHED, ERROR, or PLEASE_WAIT. double getRunTimeSeconds() Returns the duration of the experiment execution in seconds, excluding pause times. int getRunCount() Returns the number of the current simulation run, i.e., the number of times the model was destroyed. double getProgress() Returns the progress of the experiment: a number between 0 and 1 corresponding to the currently completed part of the experiment (a proportion of completed iterations of the total number of iterations), or -1 if the progress cannot be calculated. int getParallelEvaluatorsCount() Returns the number of parallel evaluators used in this experiment.
On multicore / multiprocessor systems that allow parallel execution this number may be greater than 1. - Iterations
-
Function Description int getCurrentIteration() Returns the current value of iteration counter. int getMaximumIterations() Returns the total number of iterations. int getNumberOfCompletedIterations() Returns the number of completed iterations. - Replications
-
Before calling the variation experiment functions you may need to ensure that replications are used (call the isUseReplications() function).
Function Description boolean isUseReplications() Returns true if the experiment uses replications; returns false otherwise. int getCurrentReplication() Returns the number of replications run so far for the current iteration. - Accessing the model
-
Function Description Engine getEngine() Returns the engine executing the model. To access the model’s top-level agent (typically, Main), call getEngine().getRoot();. IExperimentHost getExperimentHost() Returns the experiment host object of the model, or some dummy object without functionality if the host object does not exist. - Restoring the model state from snapshot
-
Function Description void setLoadRootFromSnapshot(String snapshotFileName) Tells the simulation experiment to load the top-level agent from AnyLogic snapshot file. This function is only available in AnyLogic Professional.
snapshotFileName — the name of the AnyLogic snapshot file, for example: "C:\My Model.als"boolean isLoadRootFromSnapshot() Returns true if the experiment is configured to start the simulation from the state loaded from the snapshot file; returns false otherwise. String getSnapshotFileName() Returns the name of the snapshot file, from which this experiment is configured to start the simulation. - Error handling
-
Function Description RuntimeException error(Throwable cause, String errorText) Signals an error during the model run by throwing a RuntimeException with errorText preceded by the agent full name.
This function never returns, it throws runtime exception by itself. The return type is defined for the cases when you would like to use the following form of call:
throw error("my message");
cause — the cause (which will be saved for more detailed message), may be null.
errorText — the text describing the error that will be displayed.RuntimeException errorInModel(Throwable cause, String errorText) Signals a model logic error during the model run by throwing a ModelException with specified error text preceded by the agent full name.
This function never returns, it throws runtime exception by itself. The return type is defined for the cases when you would like to use the following form of call:
throw errorInModel("my message");
This function differs from error() in the way of displaying error message: model logic errors are “softer” than other errors, they use to happen in the models and signal the modeler that model might need some parameters adjustments.
Examples: “agent was unable to leave flowchart block because subsequent block was busy”, “insufficient capacity of pallet rack”, etc.
cause — the cause (which will be saved for more detailed message), may be null.
errorText — the text describing the error that will be displayed.void onError(Throwable error) This function may be overridden to perform custom handling of the errors that occurred during the model execution (i.e., errors in the action code of events, dynamic events, transitions, entry/exit codes of states, formulas, etc.).
By default, this function does nothing as its definition is empty. To override it, you can add a function to the experiment, name it onError and define a single argument of the java.lang.Throwable for it.
error — an error which has occurred during event execution.void onError(Throwable error, Agent root) Similar to onError(Throwable error) function except that it provides one more argument to access the top-level (root) agent of the model.
error — an error which has occurred during event execution.
root — the top-level (root) agent of the model. Useful for experiments with multiple runs executed in parallel. May be null in some cases (e.g. on errors during top-level agent creation). - Command-line arguments
-
Function Description String[] getCommandLineArguments() Returns an array of command-line arguments passed to this experiment on model start. Never returns null: if no arguments are passed, an empty array is returned.
Cannot be called from within a value of a static variable: these are initialized before the experiment class itself.
-
How can we improve this article?
-