

Applies to AnyLogic Cloud 2.8.0. Last modified on June 24, 2026.
To open the Users tab
- While on the administrator panel, select Users in the left navigation bar.
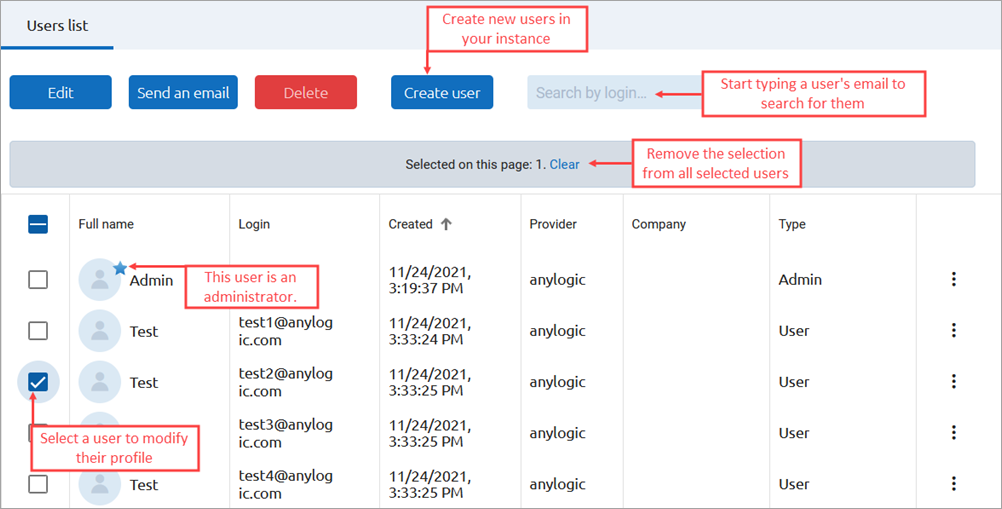
The Users tab contains the full list of users registered in your Private Cloud instance and commands that you can use to manage the user profiles.
In the right column of the table, each user record has the button. Click it to access the menu containing actions you can perform with the individual user account.
To navigate the list of users, use the pagination buttons in the bottom right corner of the screen.
To create a new user profile
- Click Create user.
-
The Create user dialog appears.
Specify the new user’s credentials in available fields:
User type Required field. The type of permissions that will be assigned to the newly created user. Users of the User type will have regular permissions, while users of the Administrator type will be able to access the administrator functionality of your Private Cloud instance, including the administrator panel. Login Required field. The login (for example, the email) of the new user. They will use it to log in to the Private Cloud instance. First name Required field. The first name of the new user. Last name The last name of the new user. New password Required field. The password of the new user. They will use it to log in to the Private Cloud instance. Passwords support Latin characters, integers, and special characters only.
To switch the password’s visibility during input on or off, click Show or Hide on the edit box’s right.Confirm password Required field. In this field, repeat the password for the new user. Passwords support Latin characters, integers, and special characters only.
To switch the password’s visibility during input on or off, click Show or Hide on the edit box’s right.Company The company the new user belongs to. LinkedIn profile The link that refers to the LinkedIn profile of the new user. Personal page The link that refers to the new user’s personal page at any other domain name. About The optional description of the new user. - Upon completing the form, click Save.
The successful creation of the new user profile will be confirmed in the notification dialog that will appear in the top right corner of the screen.
To search for a specific user profile
- Start typing the user’s email address (or a part of the email address) in the search box in the top right corner of the screen. The user list will be filtered immediately.
To edit an existing user profile
-
In the left column of the user list, select the checkbox next to the user profile you want to edit, or
Click next to the needed user’s record. - Click Edit.
-
Modify the user’s information as you see fit.
Check the table above for reference.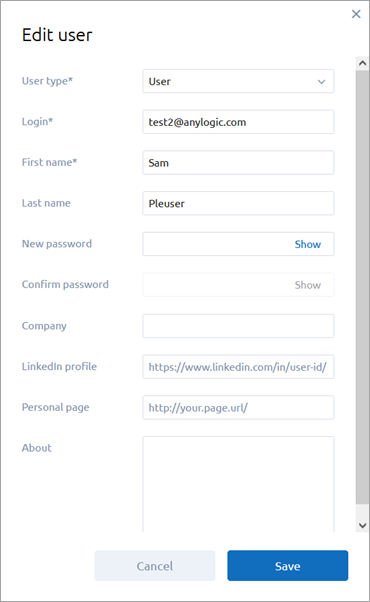
- Upon completing, click Save.
The successful modification of the user profile will be confirmed in the notification dialog that will appear in the top right corner of the screen.
To edit multiple existing user profiles
- In the left column of the user list, select the checkboxes next to the user profiles you want to edit.
- Click Edit.
-
The Edit users form appears.
Modify the users’ information as you see fit.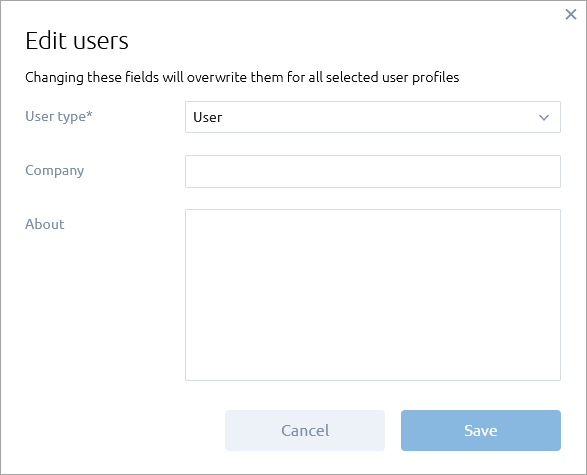 The value specified in the User type field applies to all users you have selected, that is, they will all be assigned the specified user group. Given that, we recommend making sure the users whose profiles you are trying to edit belong to the same user group.
 - Upon completing, click Save.
The successful modification of multiple profiles will be confirmed in the notification dialog that will appear in the top right corner of the screen.
To copy a user’s login
- Click next to the needed user’s record.
- Click Copy login.
or
- Move the mouse pointer over the cell in the Login column that corresponds to the needed user s record.
- Click the Copy icon that appears on the cell’s right.
To send an email to a user
-
In the left column of the user list, select the checkbox next to the user profile belonging to the user you want to message, or
Click next to the needed user’s record.By selecting multiple users with corresponding checkboxes, you can message multiple users. - Click Send an email.
-
In the resulting form, enter the text of your message.
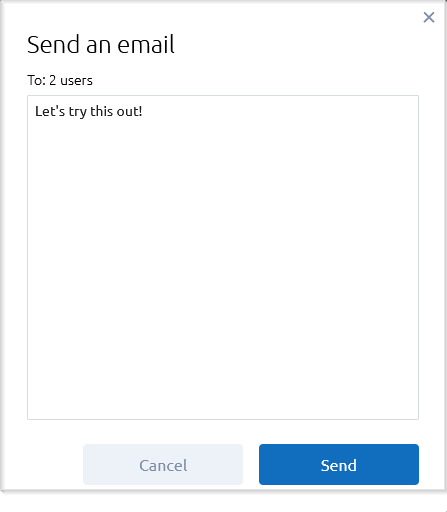
- Click Send.
Your message will be emailed to the user. In the From field of the resulting letter, the service email will be specified, so your personal information will not be revealed. You can specify the service email in the Private Cloud configuration files.
To delete a user profile
-
In the left column of the user list, select the checkbox next to the user profile you want to delete, or
Click next to the needed user’s record.By selecting multiple users with corresponding checkboxes, you can delete multiple users. - Click Delete.
- Confirm the action in the resulting dialog by clicking OK there.
If a user you are deleting is the last remaining Developer of any models, deleting their profile will result in those models being permanently deleted from AnyLogic Cloud.
This is an irreversible action. Use this functionality with caution.
The successful deletion of the user profile will be confirmed in the notification dialog that will appear in the top right corner of the screen.
-
How can we improve this article?
-