

Action Chart element defines general properties of the action chart — its return type, arguments, accessibility scope and static status.
To activate the Actionchart palette
-
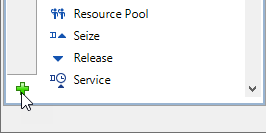
Navigate to the bottom of the Palette view and click the button.
-
Select the Actionchart item from the displayed menu of available palettes and click it.
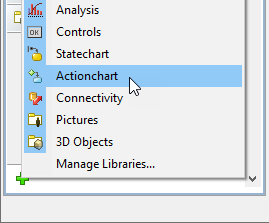
- Actionchart palette will appear in the Palette view.
To create a new action chart
-
Drag the
 Action Chart element from the
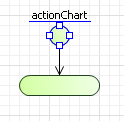
  Actionchart palette onto the graphical diagram of the agent. You will see new action chart (the basic construction consisting of a starting point and “return” block) drawn.
- Change the name of the action chart and press Enter when finished. You will call this action chart by writing its name followed by parenthesis (optionally with argument values inside).
- To define the properties of the action chart, go to the Properties view.
- If your action chart only performs some actions but does not return any result of the calculations, leave the property Just action (returns nothing) selected.
- Otherwise, if you need to obtain the result of calculations, choose Returns value. Then specify the type of the action chart’s return value. You can choose one of the most-used types (int, double, boolean, String) from the Return type control. However, if you need to return a value of some other Java class, choose the Other option and type the required class name in the edit box to the right.
- Action chart can be made static. Static action chart does not need creating any instances of the agent type where it is defined. Static actionchart defined in agent type MyClass can be accessed from any place of the model as MyClass.actionchart(). To make action chart static, select the Static checkbox in the Advanced properties section.
- Now you have created the simplest action chart. From this point on, insert required action chart blocks into their places inside the created action chart according to the logic of the implemented algorithm.
Action charts are called in the same way as functions — you write the action chart name followed by parenthesis. In the case action chart has some arguments, you should pass argument values separated by commas inside the parenthesis. The values should be provided in the order they are defined in the action chart element, in the Arguments table.
You may define arguments for your action chart to enable passing some additional input data necessary for calculations. Arguments are visible from any block within the action chart.
To define arguments for the action chart
- Select the starting point of the action chart in the graphical editor.
- Go to the Properties view.
- Define arguments in the Arguments table. Each row of the table defines one argument.
- Type the argument name in the Name cell.
- Specify the type of the argument in the Type cell. Click in the cell and choose the required type from the drop-down list or type it in the cell.
If you have defined any arguments for the function, you should pass argument values any time you call the function. The values should be provided in the order they are defined in the Arguments table.
Since the order of arguments in the table is significant, AnyLogic enables changing the argument order just moving them up or down using the buttons  and
and  .
.
To remove argument, select the corresponding row of the table and click the  button.
If your action chart contains a considerable amount of code defined with the help of the Code elements, the more convenient way to work on this algorithm could be by converting the action chart to a simple AnyLogic function and continue with coding in text format. For such cases AnyLogic offers a conversion option. Note, that this is a one-way conversion: you cannot turn the function back into the action chart.
To convert action chart to function
- Right-click the Action chart element in the graphical editor.
- Select the Convert to function command from the context menu. You will see the function
 icon appear next to the action chart in the graphical editor. The name of the newly created function will differ from the name of the action chart by the last digit.
 - If you are sure that you want to keep working on this algorithm as a function, delete the action chart.
- Change the name of the function to the name of the deleted action chart.
- Keep working on the algorithm in the code editor located in the Function body section of this function’s properties.
- General
-
Name — The name of the action chart. The name is used to identify and call the function defined by this action chart from code.
Show name — If selected, the name of the action chart is displayed on a presentation diagram.
Ignore — If selected, the action chart is excluded from the model.
Visible — If selected, the action chart is visible on the presentation at runtime.
Just action (returns nothing) — If selected, this actionchart just executes some action(s) and does not return any value.
Returns value — If selected, this actionchart returns a value (a result of calculations and actions). You specify the type of the return value using the control below.
Return type — Specify here the type of the function’s return value. Function can return value of some most-used types (int, double, boolean, String), or of some Other Java class (in this case specify Java class name in the neighboring field).
Arguments — Here you can define some optional arguments for the function defined by this action chart to enable passing some additional input data necessary for function calculations.
Each row of the table specifies one particular argument. To remove argument, select the corresponding row in the table and click the “cross” button. Rearrange arguments in the table using “arrow” buttons. - Advanced
-
Fill color — Sets the fill color for this action chart element. Click inside the control and choose a color from the set of most used ones, or choose some custom color using the Colors dialog box.
Static — [Only visible if Library developer mode is enabled] If selected, the function defined by this action chart is static. Static function does not need creating any instances of the agent type, in whose code it is defined. Static function defined in agent type MyClass can be accessed from any place of the model as MyClass.function().
Visible on upper agent — Defines, whether the action chart is visible on a presentation diagram of the owner of this agent type. Since action charts cannot appear on owner class' presentation, this checkbox is always deselected and disabled.
Access — The access type of the function defined by this action chart. There are four access types:
- public — the function can be accessed from anywhere
- private — the function can be accessed from this agent type only
- protected — the function can be accessed from this agent type and its subclasses
- default — the function can be accessed anywhere within this model.
System dynamics units — If selected, you will be able to specify units of measurements for the value returned by this actionchart in the edit box to the right. Having specified units for elements of your model, you may perform unit checking to find out dimension inconsistencies in the model.
-
How can we improve this article?
-