


Currently our model contains automobiles only. In this step, we will add buses. They will move south to north along Tapiolavägen, making a stop at the bus stop after the intersection.
Add a block that generates buses
-
Add another
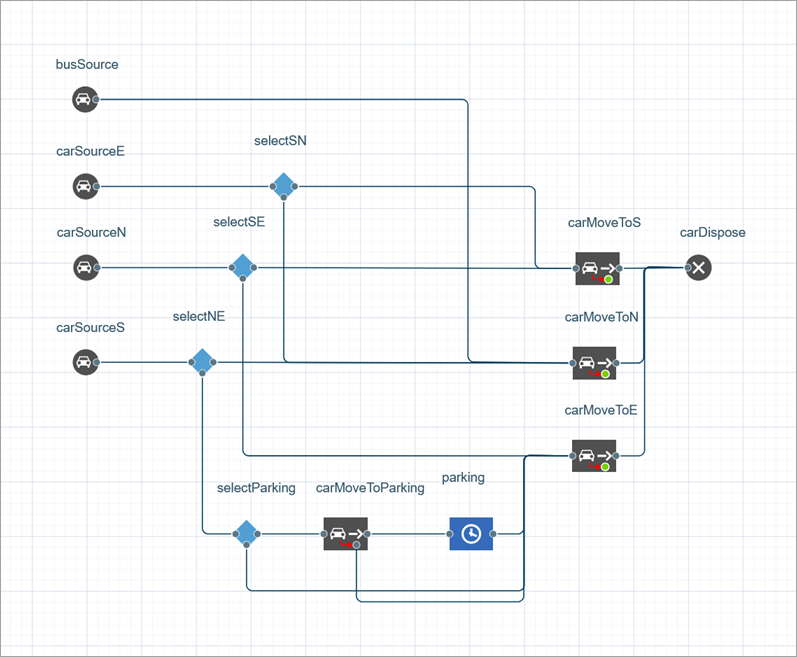
 Car Source block from the Road Traffic Library. This block will generate buses. Name it busSource and connect it to the carMoveToN block.
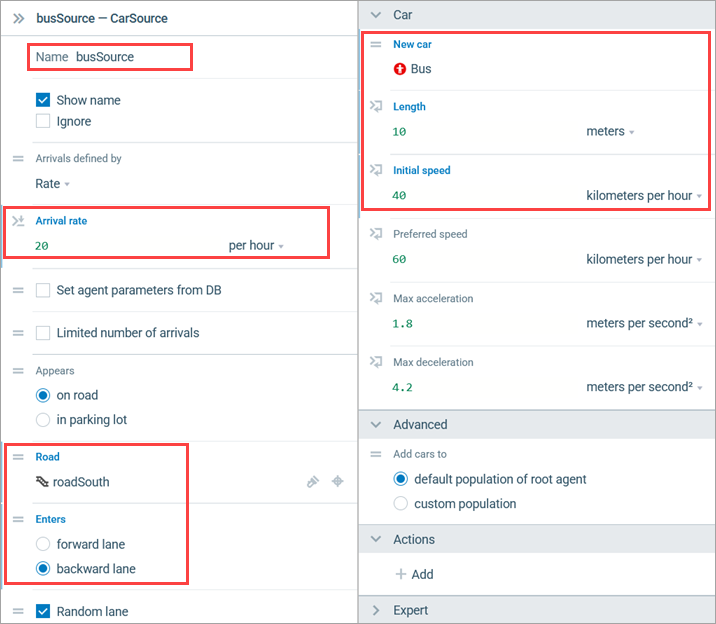
- Since buses appear less frequently than cars, we need to modify the properties of the previously created block. Let’s set the Arrival rate to 20 per hour.
-
Choose
 roadSouth in the Road parameter.
- Under Enter, select backward lane, as the buses are entering the road in the South and are headed North, which is the direction opposite to the one marked as forward.
-
Unlike the
 Car Source blocks we created earlier, this one should generate buses, not cars. Open the Car section of the block’s properties and create a new agent type: click the New car field and select Create new agent in the context menu.
- The New agent type wizard appears. Specify Name as Bus.
- Under Animation shape, select one of the built-in shapes listed as Bus.
- Click Finish.
- Back on the Main diagram, in the Car section of the busSource block properties, set the Length of the buses to 10 meters.
- As for the Initial speed, make it 40 kilometers per hour.
Compare the properties you set to ones in the figure below and make sure every parameter is specified correctly.
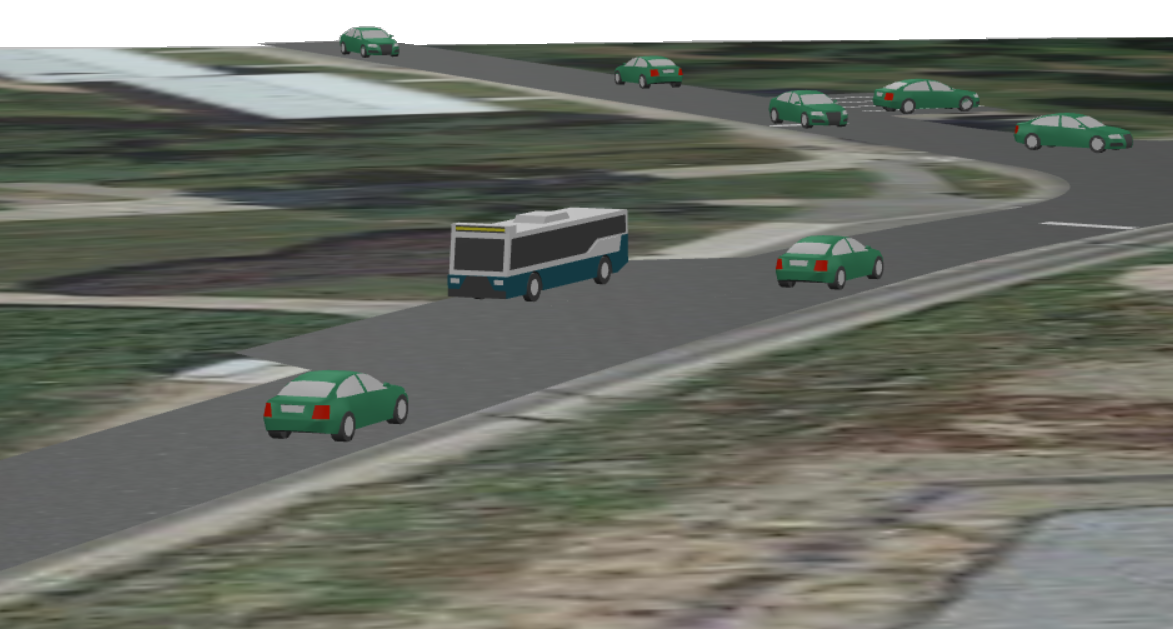
Run the model. You will see that buses appear occasionally in the South and move to the North. You might have to wait for a bus to appear, just like in real life.
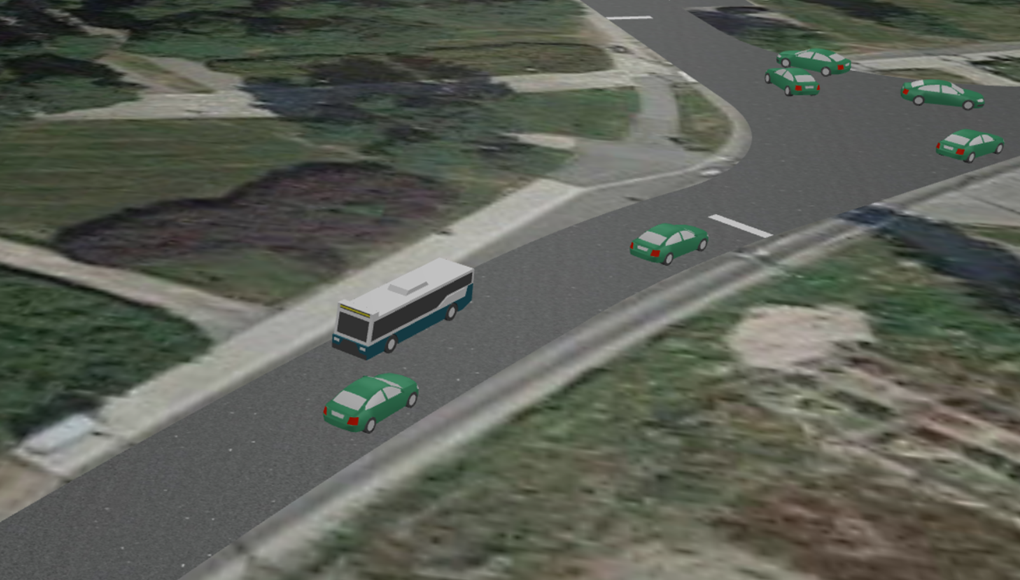
On the screenshot above, a bus is approaching the bus stop. Let’s change the logic of the model to make buses stop there.
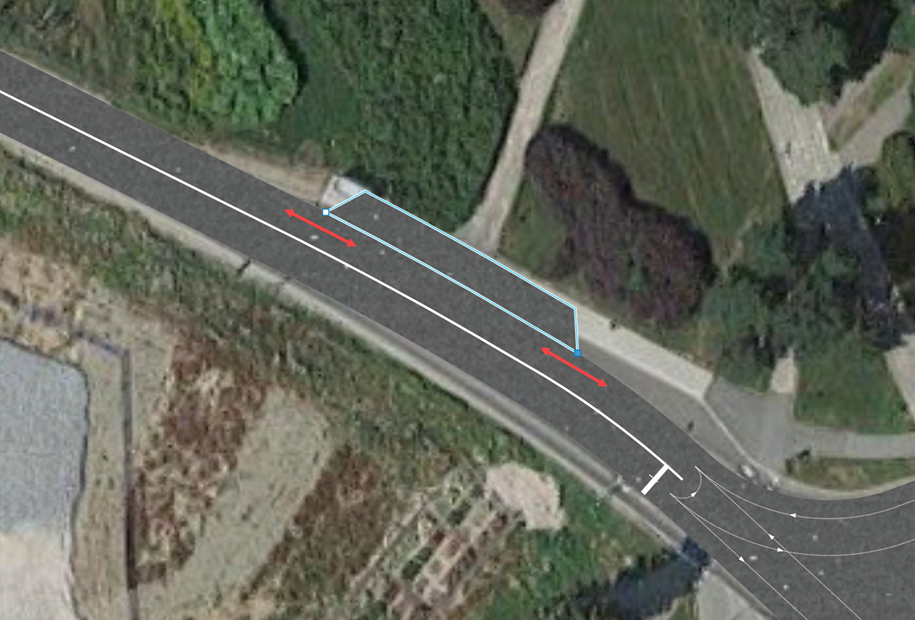
First, we need to create a bus stop using a ![]() Bus stop space markup element.
Bus stop space markup element.
Draw a bus stop
-
Drag the
 Bus Stop element from the Space Markup section of the Road Traffic Library palette to the graphical editor. Place it at the roadside as shown in the figure below: the outline of the bus stop is shown in pale blue.

-
Increase the length of the bus stop by dragging the handles.
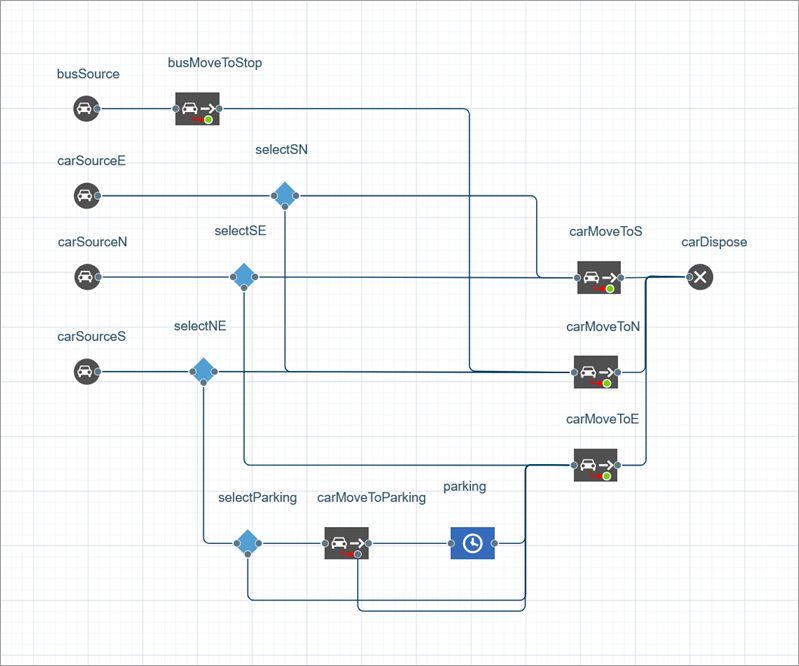
Now we need to add new blocks to the flowchart.
Adjust the flowchart
-
Add another
 Car Move To block to the busSource block’s flowchart branch (see figure below). Name it busMoveToStop. It will make the bus go to the bus stop.
- Switch to the Properties view of the busMoveToStop block and choose bus stop in the Moves to parameter. In the Bus stop option below, specify the name of the previously created bus stop (busStop).
-
Now we need to set the period of time that buses spend at the bus stop. Add a
 Delay block from the Process Modeling Library palette. Name it stop and connect it as shown on the figure below.
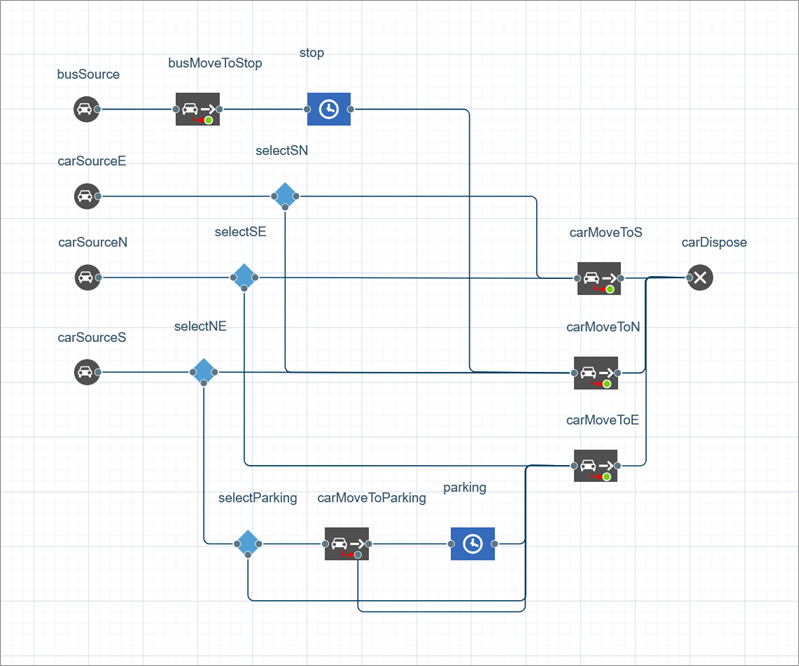
- Go to the block properties and specify the Delay time: triangular( 15, 30, 90 ) seconds.
Run the model. You will see that buses arrive at the bus stop and wait for passengers to get on and off. After that, the buses drive on according to the specified route.
-
How can we improve this article?
-