


This phase is devoted to creating a parking lot at the Menninkäisentie roadside. It is clearly visible on the layout right below the road.
However, before we start, we should improve our current model. As you might have noticed, the Menninkäisentie access road areas do not fully correspond to the actual roads on the layout. Let’s adjust the intersection so they match more accurately.
Adjust the intersection layout
-
Zoom in on the intersection to make editing easier. Use the toolbar Zoom In button or scroll away from yourself while pressing Ctrl (macOS: Ctrl or Cmd).
-
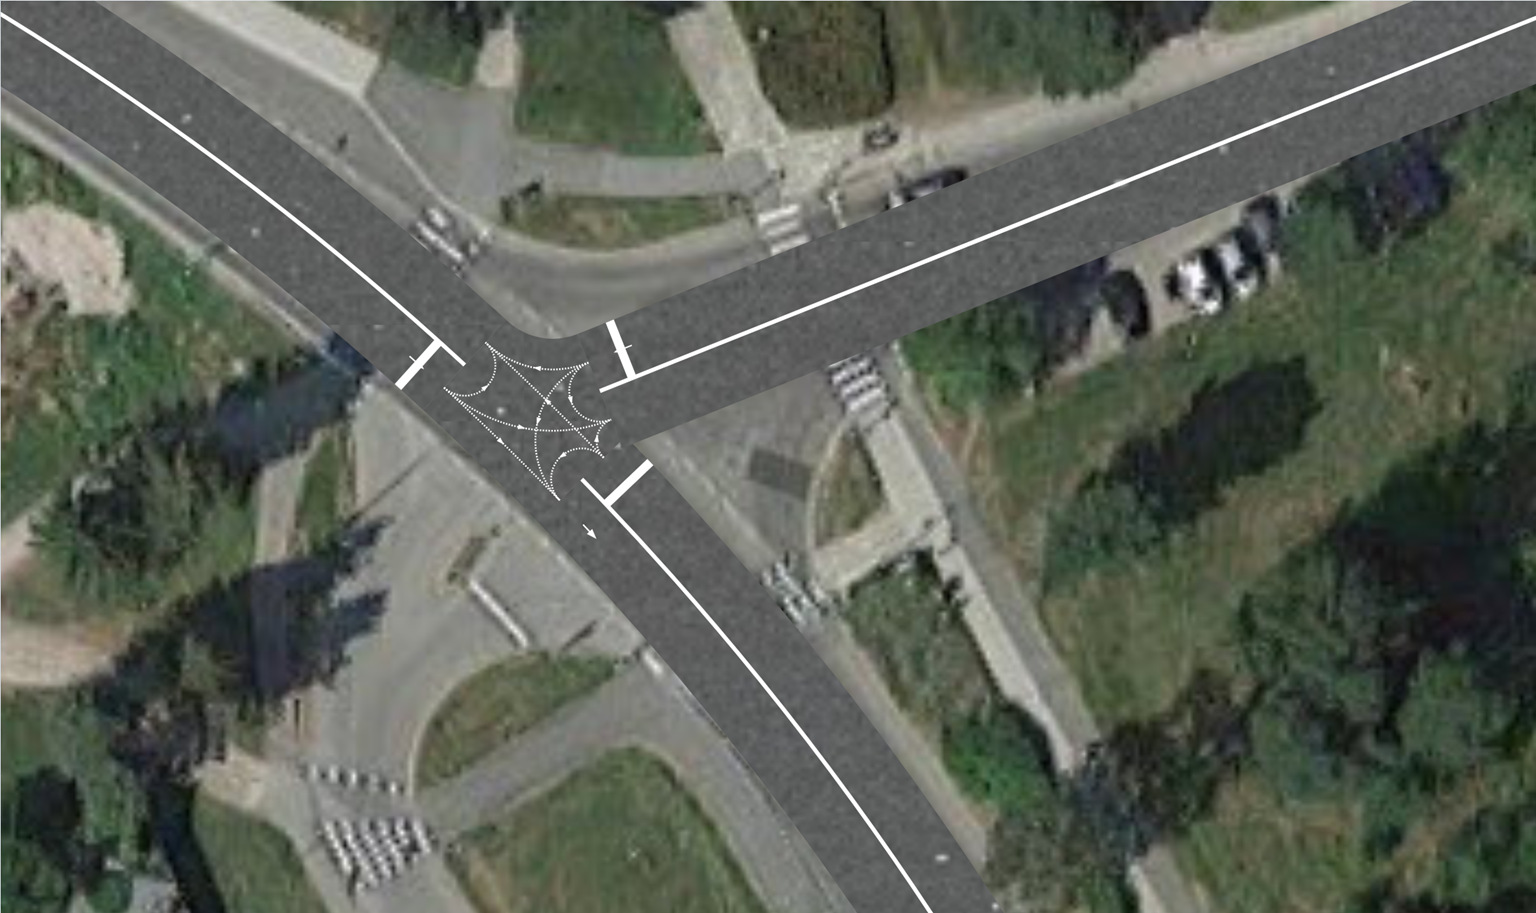
Now we need to extend the intersection for the turn area in the model to correspond to the actual turn area on the picture. Select the
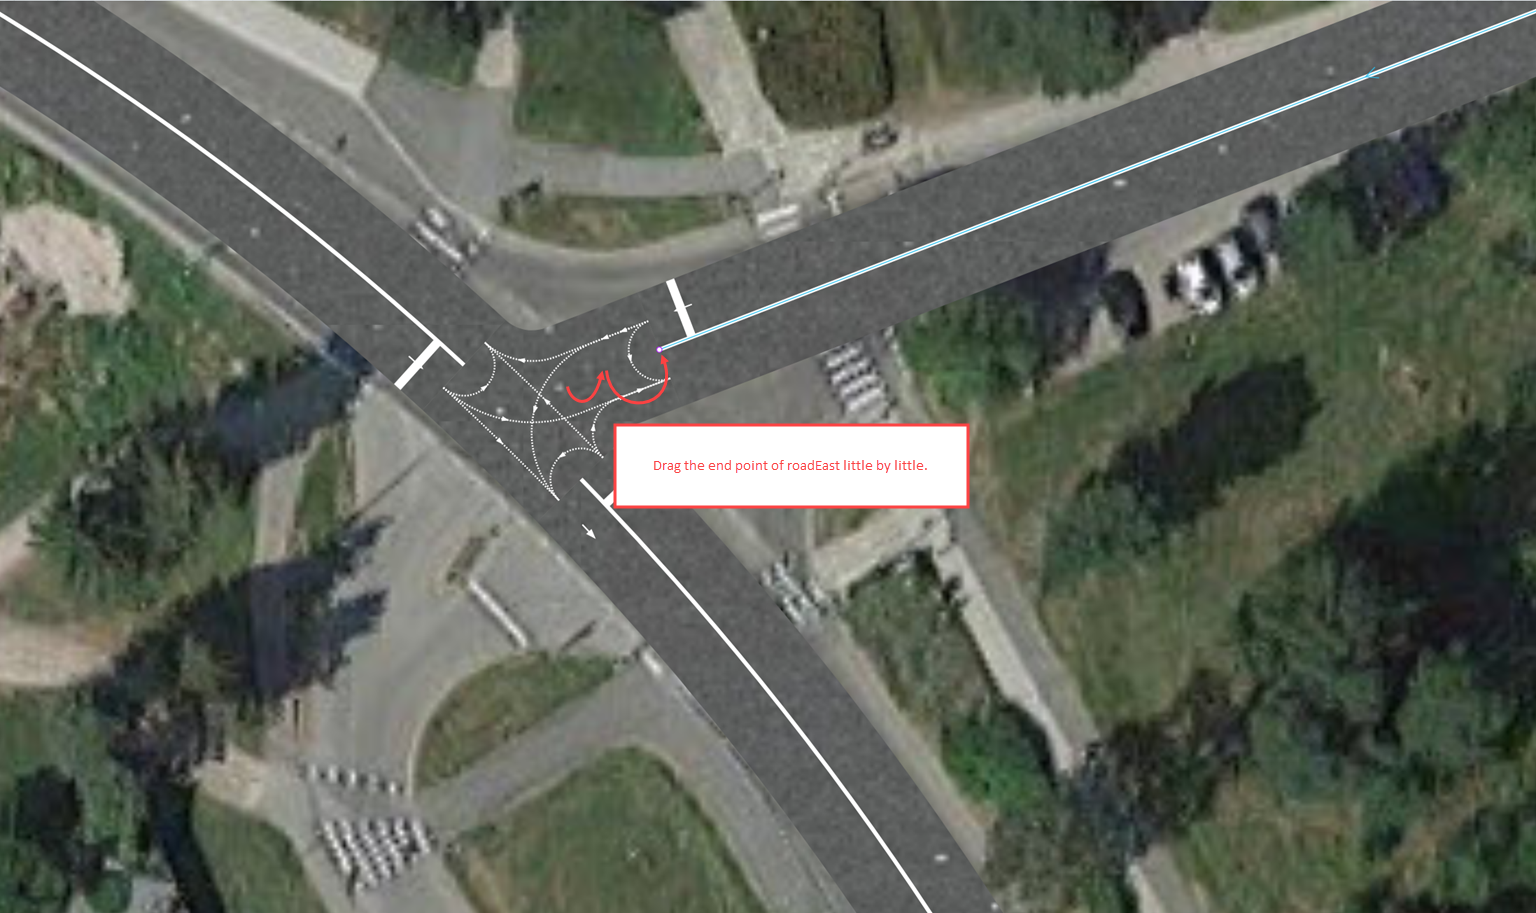
 roadEast road in the graphical editor. Its end points will be highlighted. Using the layout as a reference, move the end point connected to the intersection in small steps. If you move it too far at once, it may disconnect from the intersection. If this happens, press the Undo button on the top toolbar.
-
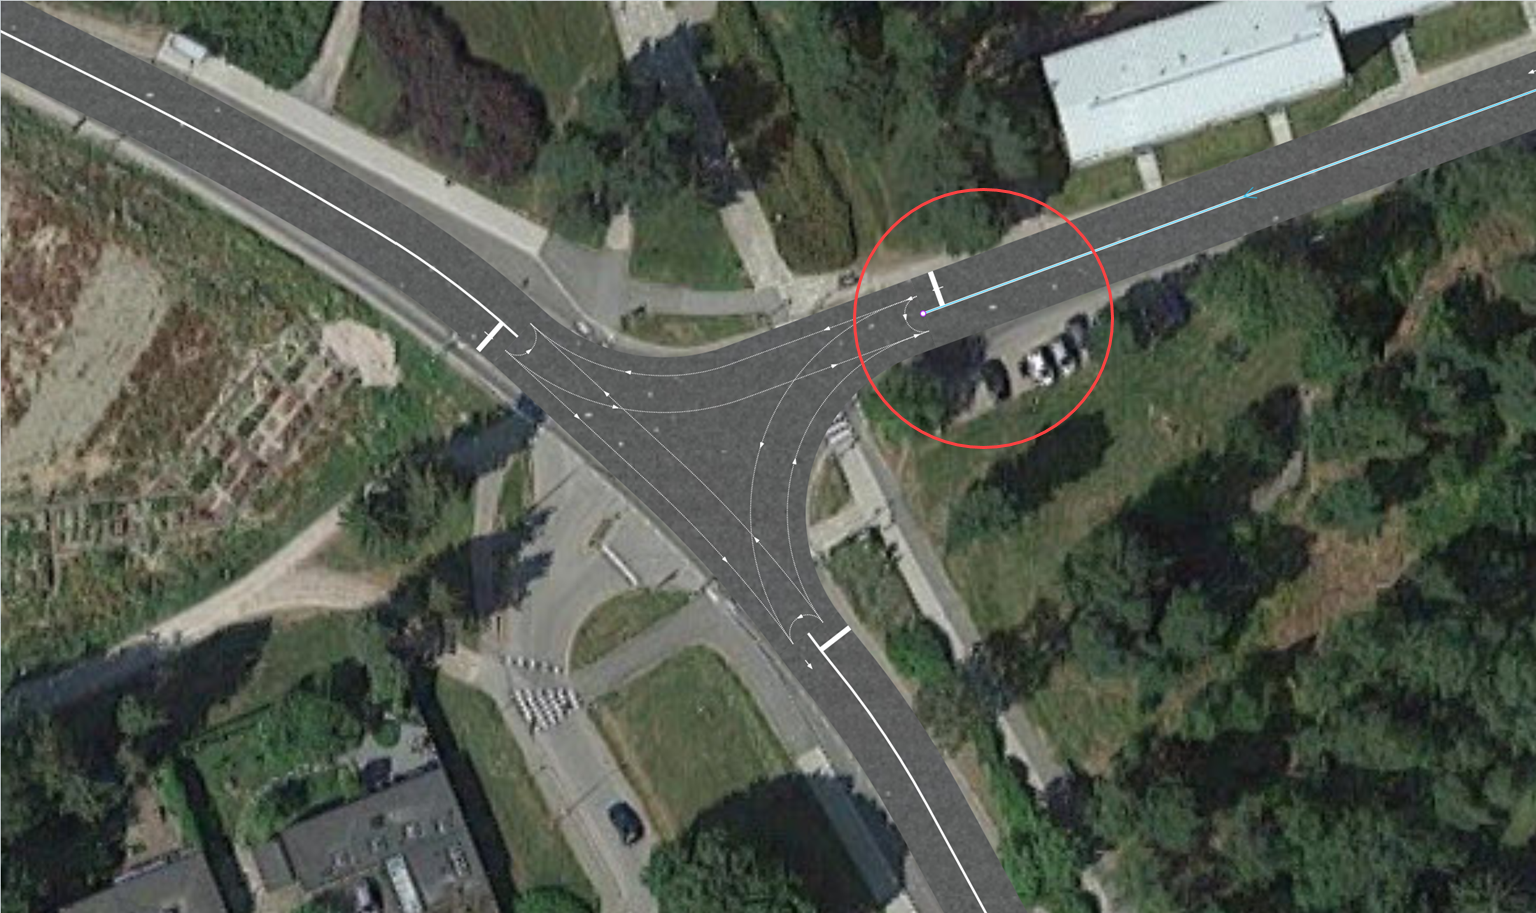
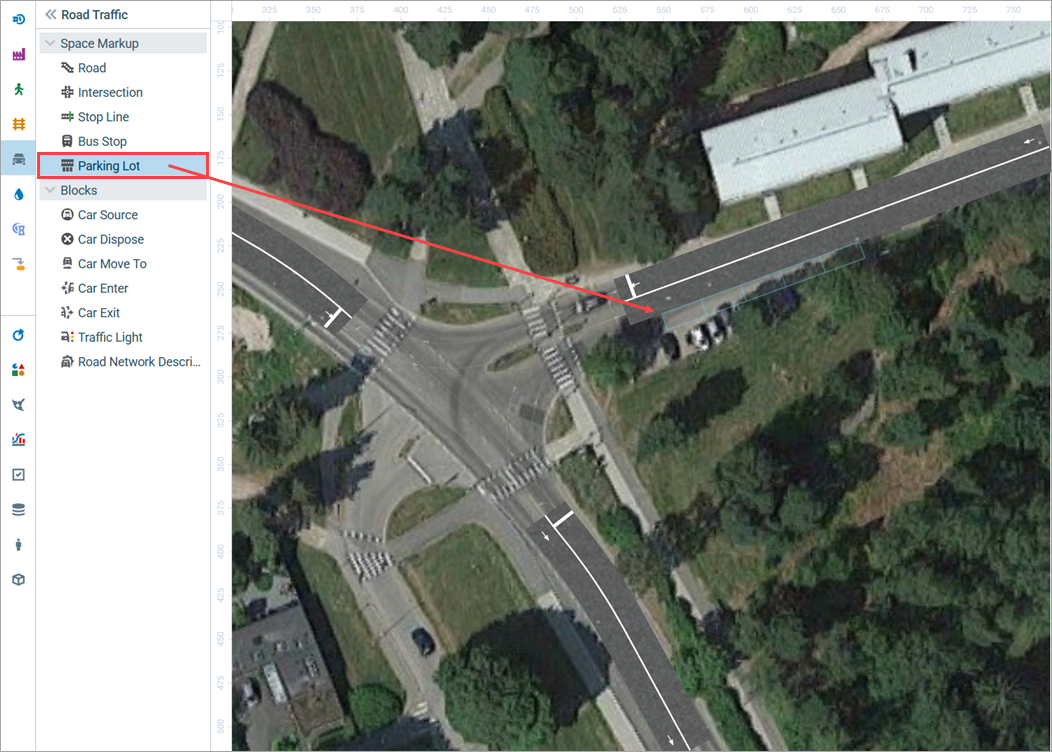
Carefully move the roadEast end point away from the intersection until it reaches the parking lot you see in the layout image. Use the figure below as a reference.
-
Drag the end points of the other two roads in a similar way. Adjust all the roads until they take the shape of the actual intersection.
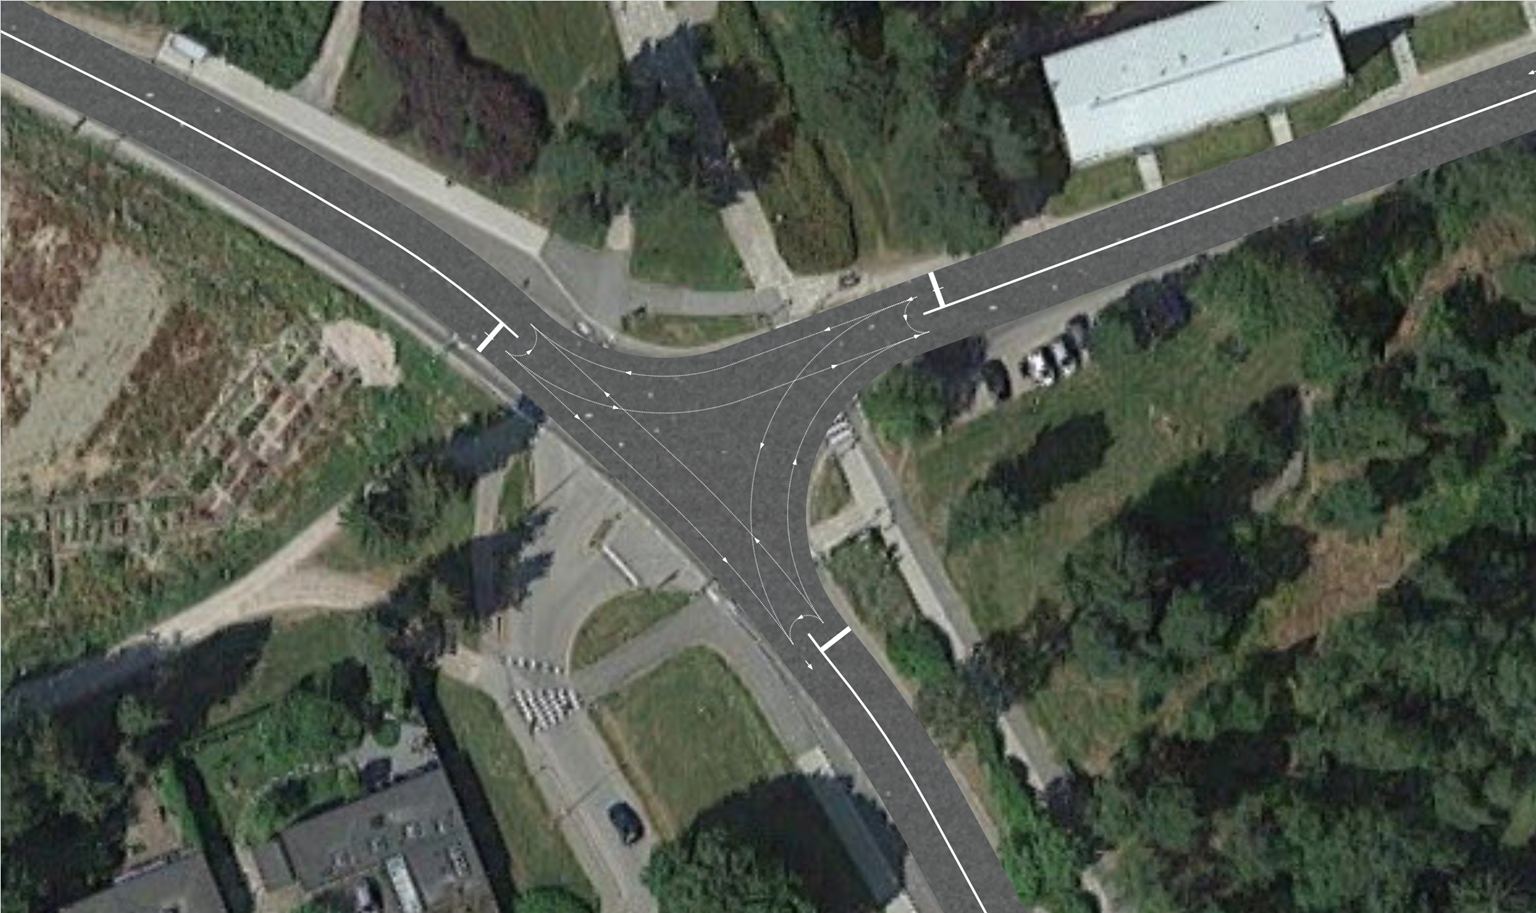
Run the model. Finally, the road traffic will completely correspond to the actual intersection area.
Now that we are done perfecting our model, we can move on and model car behavior related to the parking lot.
Draw a parking lot
-
Drag the
 Parking Lot element from the Space Markup section of the Road Traffic Library palette to the graphical diagram. All elements except for the roads will be temporarily hidden. Drop the Parking Lot at the side of Menninkäisentie (roadEast) just where the parked cars are on the layout. The parking lot will connect to the road. You can change the parking lot’s location if needed by dragging it to the proper location.
-
Switch to the Properties view and set the Type of the parking lot to Perpendicular. It should look like this now:

- By default, the parking lot is created with five parking spaces. You can define the Number of parking spaces in the element’s properties. We will not adjust the element’s properties since it is the five space parking lot that we need.
- The length of the parking space can be modified in the Length of parking space property. The width though is defined in the Lane width property of the road network and applies to all road network elements, such as roads or intersections.
Now we need to add blocks to the flowchart to direct traffic into the parking lot and make cars stay there for a defined period. To keep our flowchart simple, instead of creating an excessive number of identical blocks we will only model the “drive in” action for the cars moving from the North along Tapiolavägen and then turning to Menninkäisentie.
Modify the flowchart
- We want some of the cars coming from the North and turning to Menninkäisentie to drive into the parking lot located at the roadside. First of all, we need to delete the connector between the selectNE and carMoveToE blocks as we will need to divide the traffic flow at this point one more time. Some of the cars will move to the parking lot, while the rest will move to the end of Menninkäisentie.
-
To split the traffic, add another
 Select Output block from the Process Modeling Library. Name it selectParking and connect its ports to the ports of the other blocks as shown in the figure below.
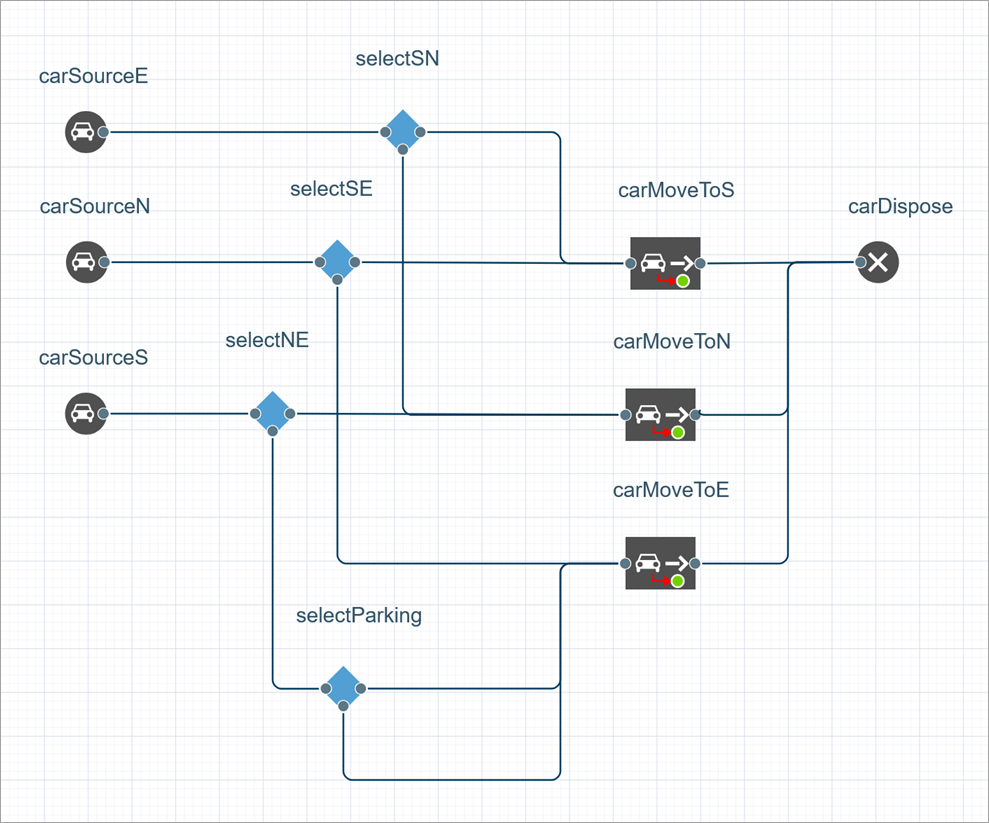
- Let’s assume that 10% of the cars go to the parking lot. Enter 0.1 in the Probability field. This way we define the number of cars that will be sent to the upper output port of the block.
-
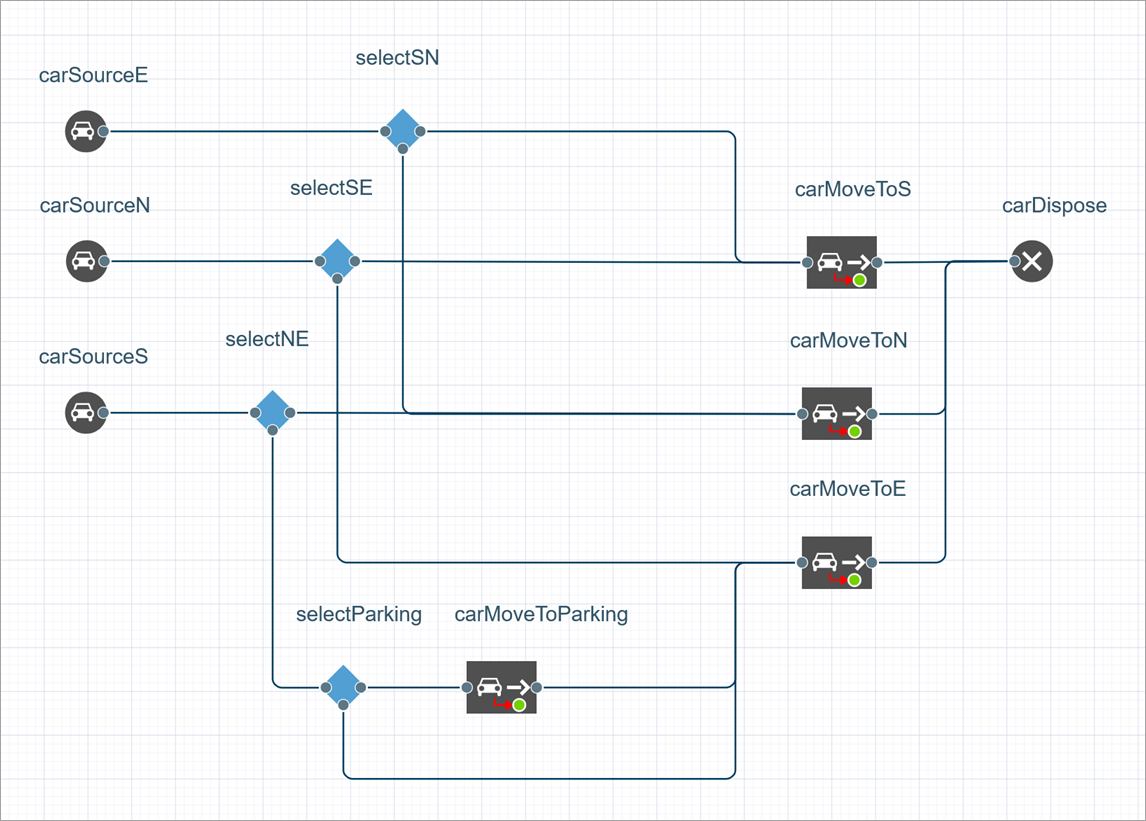
Add another
 Car Move To block to the process branch of the selectParking block’s upper output port (see figure below). Name it carMoveToParking. This block will model the behavior of cars that should drive to the parking lot.
-
Choose Parking lot in the Moves to parameter, then choose the name of the previously created parking lot ( parkingLot) in the Parking lot property.
-
The next step is to model the period of time the cars spend on the parking lot. To do that, we need to add a
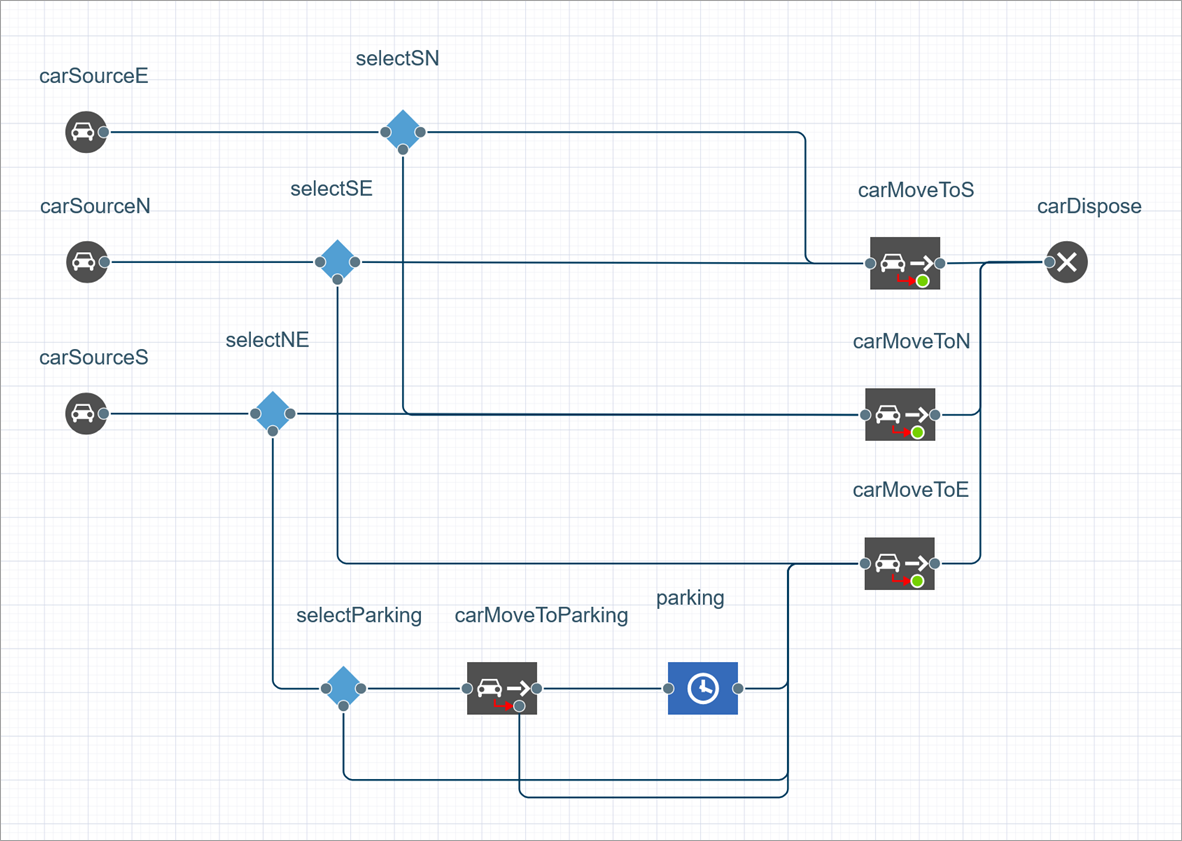
 Delay block from the Process Modeling Library. Name it parking and make sure to connect it as shown in the figure below.
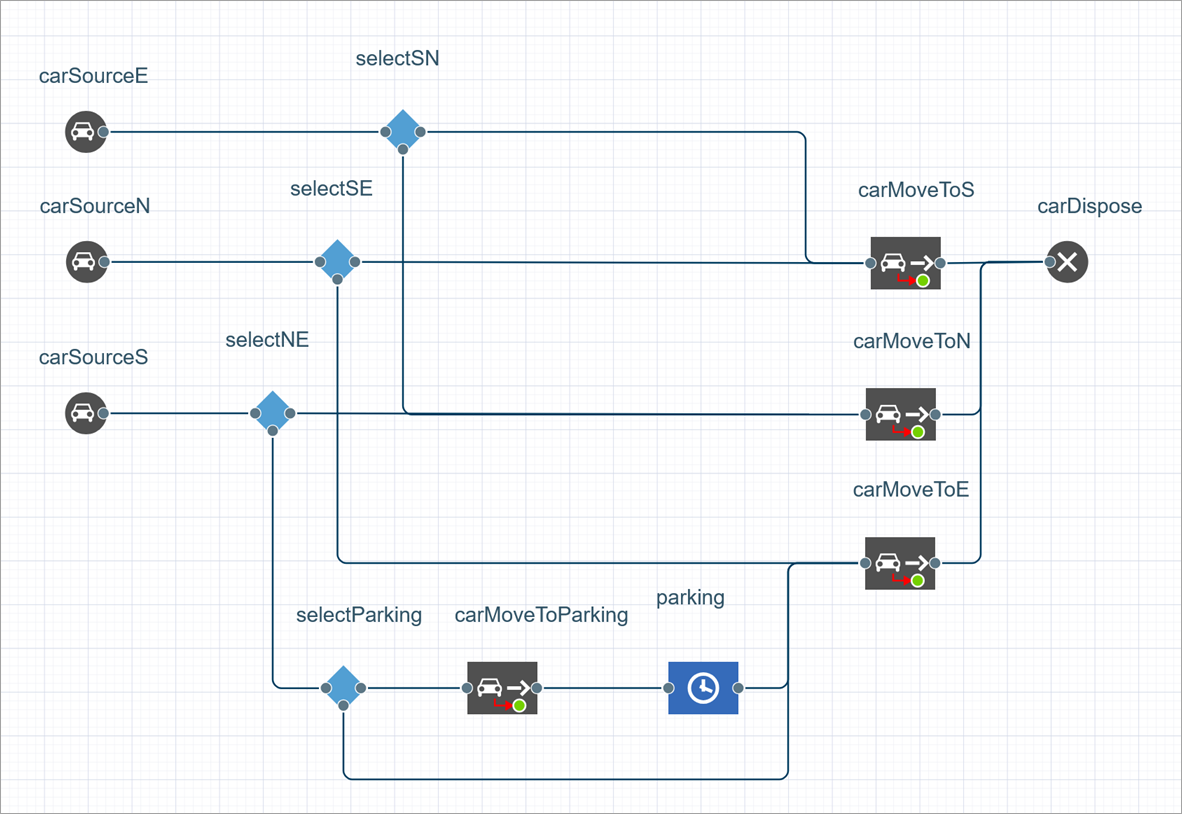
- This block simulates the delay that occurs when the agent executes a certain operation, in our case it is the waiting time in the parking lot. Open the block’s properties and change the Delay time to triangular( 5, 15, 45 ) minutes.
- Since up to five cars can be simultaneously parked in the parking lot, set Capacity to 5. This property specifies the maximum quantity of agents (cars) that can fit in the block.
Run the model now and you will see that cars occasionally park in the parking lot. Try running the model in the virtual time mode by clicking the  Run as fast as possible (virtual time mode) control. You will most probably see an error message due to a car that is sent to the parking lot with no vacant parking spaces. This can be fixed by making minor changes to our flowchart.
Adjust the flowchart
As you might have noticed, in addition to the two standard ports on its left and right sides, the ![]() Car Move To block has another port down below, with a red arrow pointing at it. This port is called outWayNotFound. This is the block’s output port for the cars that cannot find the route to the destination assigned by this block.
Car Move To block has another port down below, with a red arrow pointing at it. This port is called outWayNotFound. This is the block’s output port for the cars that cannot find the route to the destination assigned by this block.
-
Connect the lower output port of the carMoveToParking block with the input port of the carMoveToE block. If a car enters the carMoveToParking block when the parking lot is full, it will be redirected to this port and proceed along the road.
Run the model and make sure there are no errors in it.
Demo model: Road Traffic Tutorial - Phase 4 Open the model page in AnyLogic Cloud. There you can run the model or download it (by clicking Model source files). Demo model: Road Traffic Tutorial - Phase 4Open the model in your AnyLogic desktop installation.-
How can we improve this article?
-