|
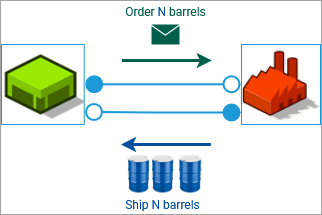
Both the retailer and the factory are entities that can communicate and have certain behaviors. We could use the same approach to establish communication between them as we did for the stations and the retailer: that is, to use references or “addresses”. However, since there is only one retailer and one factory, and both of these agents have process flowcharts inside them, we can simply connect the two objects graphically using ports and avoid writing any code. Basically, we need entities (agents) to carry an integer number back and forth, and in this simple model, only one agent of type |
|
You create a factory in the same way you created other entities in your model: as an agent type.
To create a factory
- Create a new agent type,
Factory, and use the Factory 2D image for its icon. As you did earlier, enlarge the image.
-
From the
Basic Elements palette, add two
Ports and place them in the grid to the left of the image.
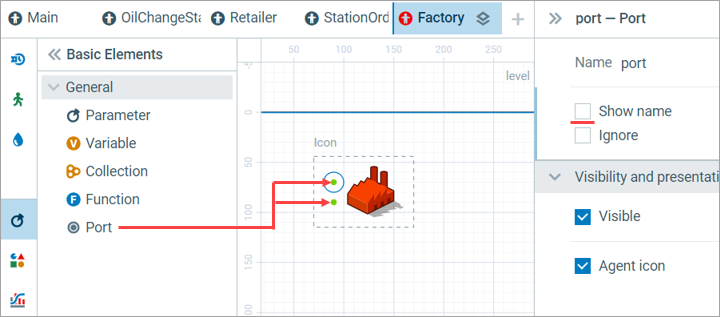
- Disable the Show name option in the properties of these two ports, since we do not need to see the port names.
To communicate its requests to the factory, the retailer also needs ports.
To make the connection
-
Switch to the
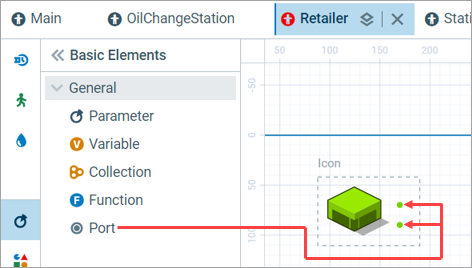
Retailer agent type and add two ports to the right of its icon. Hide the port names, as you did earlier for the factory.
-
Switch to the
Main agent type.
-
From the
 Projects view, drag and drop the
 Factory onto the graphical diagram of the
Main agent and place it to the right of the retailer.
The top ports of the retailer and factory should automatically connect when they are aligned.
- Connect the bottom ports manually by clicking one port and then another.
Make sure that both the top and bottom ports of retailer and factory are connected.
Like we discussed earlier, we need an agent type to represent an order.
To create an agent
- Create a new agent type:
RetailerOrder.
-
From the
Basic Elements palette, drag and drop the
Parameter element onto the graphical diagram of the new agent.
Name it amount.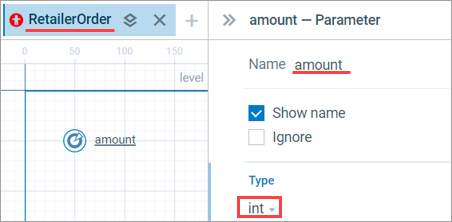
-
Set the parameter type to int in the properties.
This parameter will represent the number of barrels the retailer is ordering.
To model the (s, S) inventory policy, we will make use of various variables and parameters.
To add variables and parameters
- Switch to the
Retailer agent type.
- Locate the stock variable you created earlier. Press Ctrl, click it, then drag and drop to a new location on the diagram to create a copy.
-
Rename and configure the copy of the variable:
Name: expecting
Initial value: 0 This variable will represent the amount of oil the retailer expects to receive but has not yer received. -
Add two parameters, Smin and Smax. Set them both to the type int and assign their initial values:
Smax — 500
Smin — 100
These are the inventory policy parameters. -
Set the initial value of the stock variable to Smax.
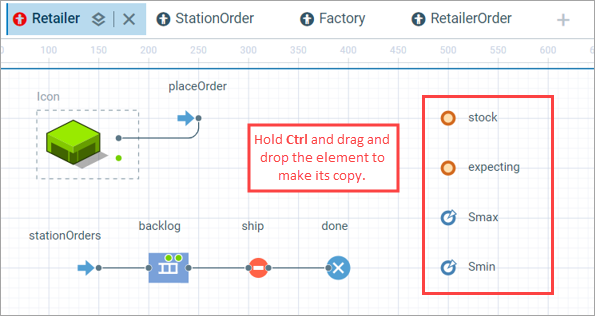
-
From the
Process Modeling Library palette, add the
Enter block. Name it placeOrder and connect it to the top port of
Retailer.
-
Next, select the
Hold block named ship that we created earlier and make some adjustments to the On enter code:
This is how we actually model the policy. We ship a barrel, and then when the stock plus whatever is on the way is less than or equal to Smin, we order to replenish to Smax, and remember how much we ordered.agent.station.delivery.take ( new Agent() ); stock--; if(stock + expecting <= Smin) { int n = Smax - ( stock + expecting ); placeOrder.take( new RetailerOrder( n ) ); expecting += n; }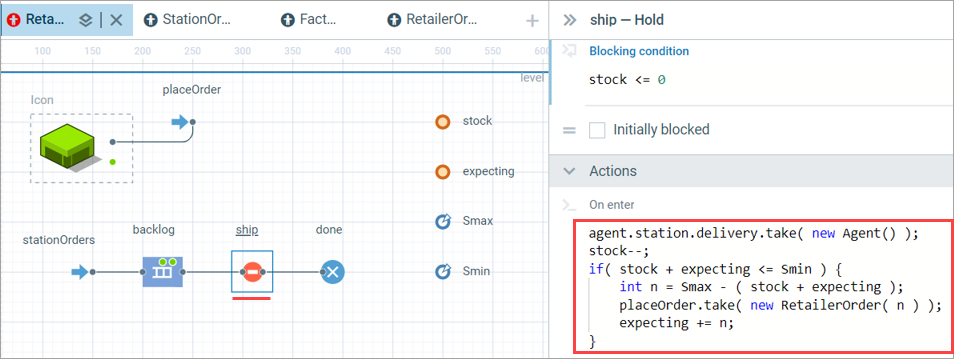
-
Next, let’s model the delivery.
From theProcess Modeling Library palette, add the
Sink block and connect it to the bottom port.
Name the block delivery. -
In the properties of the
Sink block, set the Agent type property to
RetailerOrder. Notice that we use the same agent type for the order and the shipment.
-
Set the On enter action of the Sink block to the following:
With the last line, we make sure that the ship block (Hold) knows that the stock variable has been updated by recalculating the conditions and possibly shipping more orders to the stations.stock += agent.amount; // add what was delivered expecting -= agent.amount; // subtract what is on the way ship.recalculateConditions();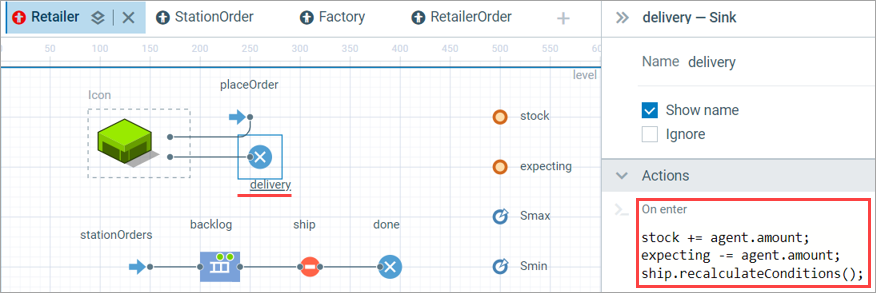
Before we run the model yet again, let’s configure the behavior of the Factory agent.
To configure the factory
-
Switch to the
Factory agent type.
-
Add two Parameters of the double type:
setupTime, with Default value: 2;
itemProductionTime, with Default value: 0.04 -
From the
Process Modeling Library palette, add two blocks:
Queue and
Delay. Connect them to each other and to the ports, as shown in the figure below.
-
Set the block properties to the following:
-
Queue:
Name: backlog
Maximum capacity enabled
Agent type: RetailerOrder — again, note that we use the same agent type for both the order and the shipment. -
Delay:
Name: production
Delay time: setupTime + agent.amount * itemProductionTime.The value for the delay time is straightforward. But how do we ensure that orders are processed one at a time and not in parallel? This is controlled by the Capacity parameter of the Delay block, which is 1 by default.
-
Queue:
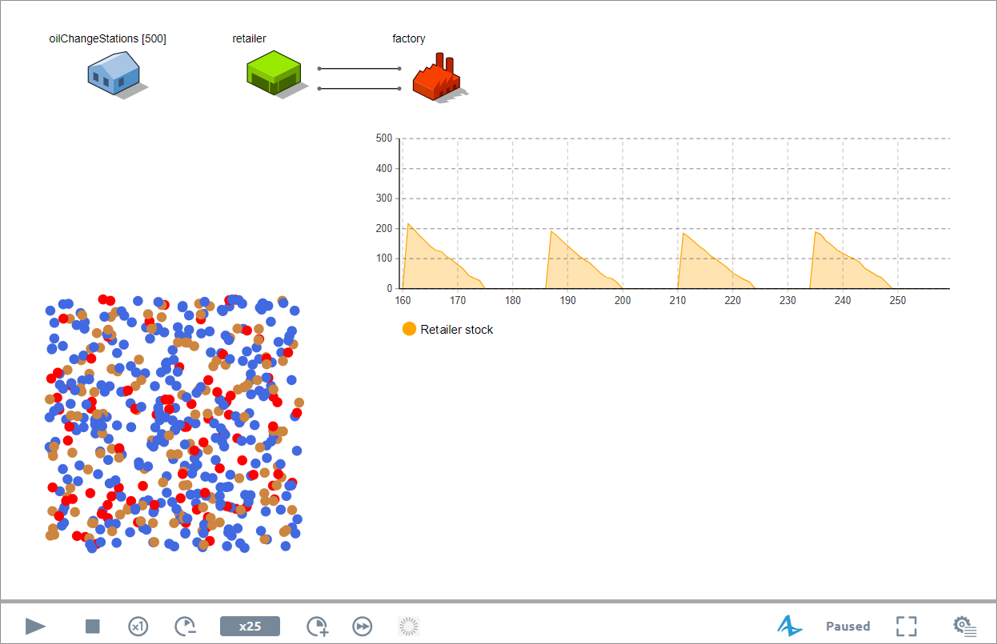
Run the model again and see how the retailer’s stock has become patterned.
-
How can we improve this article?
-


