


As you may have noticed while running your current model, we had many rail cars that differed only in color. Phase 3 will focus on defining different types of rail cars.
Create new rail car types
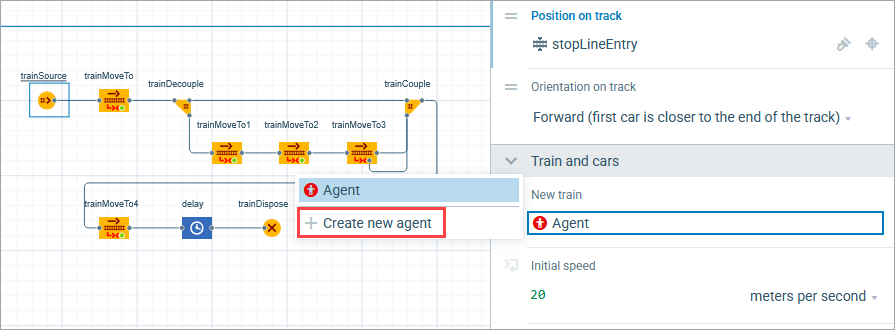
- To create a new type of rail car, select the TrainSource block on the
 Main diagram.
 - In the Trains and cars section of its properties, click the value of the New train property.
-
In the menu that appears, click
 Create new agent.
- The New agent type wizard appears. Specify Agent type name as Locomotive.
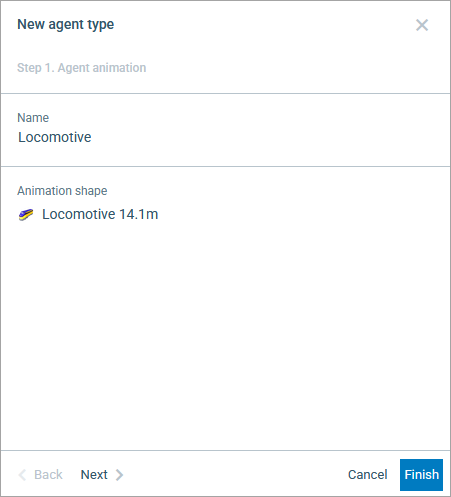
- Under Animation shape, select one of the built-in animation shapes. By default, the Locomotive 14.1m shape is selected; leave it as is for this type of agent.
- Click Finish.
-
A new agent type is created and its diagram opens automatically.
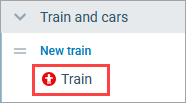
Similarly, use the New car property to add 5 more rail car types: BoxCar, OpenCar, GondolaCar, TankCar, and HopperCar. Set the appropriate 3D shapes for each. - Finally, create one more train type and name it Train.
Configure the TrainSource block
We will configure the TrainSource block to generate trains of our custom type ![]() Train by modifying its parameters in the Trains and cars section.
Train by modifying its parameters in the Trains and cars section.
-
New train: Train
-
In the same Trains and cars section, specify dynamic expression in the New rail car field.
Switch to the code field by clicking the icon. It will turn into
  , allowing you to insert the code in the field right next to it. Enter the following expression:
carindex == 0 ? new Locomotive() :
randomlyCreate( OpenCar.class,
BoxCar.class, GondolaCar.class,
HopperCar.class, TankCar.class )
When typing the Java code manually, you can use code completion by pressing Ctrl + Space (macOS: Fn + Ctrl + Space) while in the code box. This feature provides you with the list of available functions and model elements, allowing you to select the desired item from the list and avoid mistypes when referencing it.We use a conditional operator to set the railcar type for the railcars of the train being created. We want to diversify the railcars in our freight train. The first railcar should be of the Locomotive type. The subsequent railcars can be any other type.
When TrainSource creates a new train, it successively calls the expression specified in the New rail car property for each car in the train. By using the carindex local variable, we pass the index of the currently created railcar to the expression.
The conditional operator allows you to choose between two given alternatives based on the value of a Boolean expression. In our example, if the carindex == 0 expression evaluates to true, then the current railcar is the first car of the train and its type is set to Locomotive. Otherwise, if the expression evaluates to false, we call the randomlyCreate() function and provide the classes of the railcar types to randomly select types for subsequent railcars in the train.
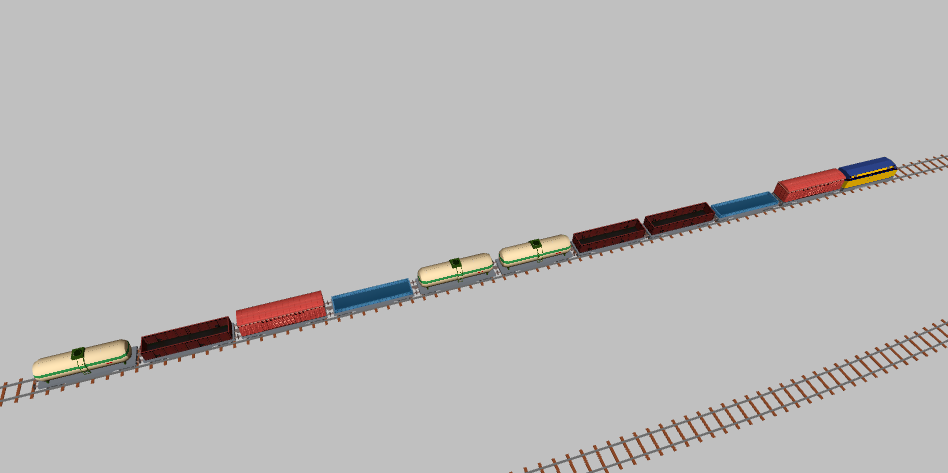
As a result, the train will have a locomotive as the first car, followed by ten rail cars of our custom rail car types.
Watch the model in 3D mode
- Add the
 3D Window element from the
  Presentation palette. Place it below your flowchart and animation.
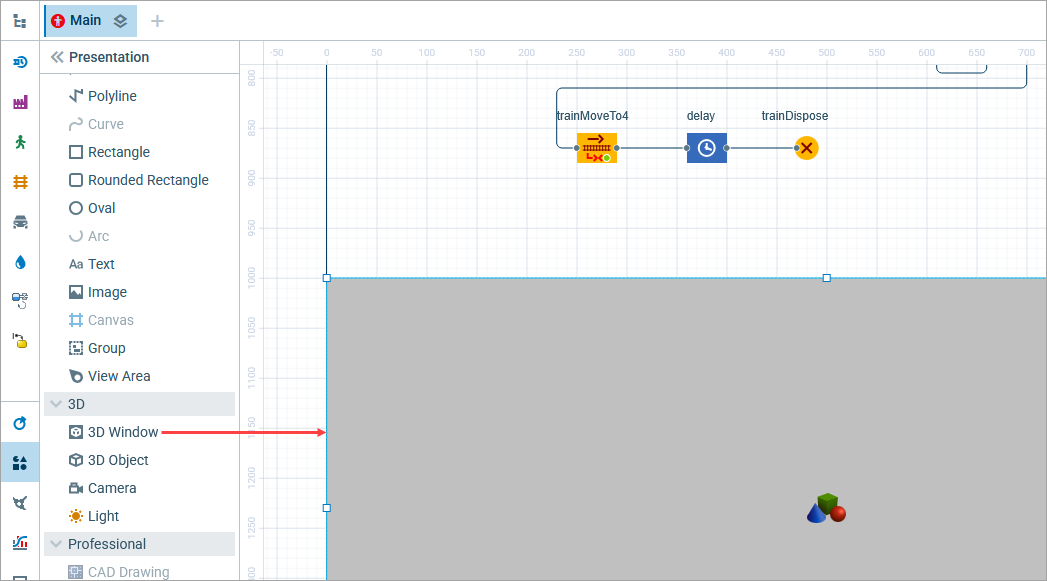
- When you create a 3D window, AnyLogic adds a view area that allows you to easily switch to the 3D view while the model is running. To switch to the 3D view while the model is running, enable the developer panel.
-
Run the model.
Open the developer panel by clicking the Developer panel control in the bottom right corner of the control panel. In the developer panel, expand the
  navigation list and select [window3d] from the list.
The view area expands the 3D animation scene to the model window’s full size.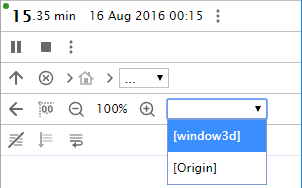
-
You can now see the train, which consists of a locomotive as the first rail car and ten other types of rail cars that we defined in this phase.
-
How can we improve this article?
-